

Keeping your ice maker clean goes way beyond a simple wipe-down. It's a two-part process: first, you descale to bust up all that mineral buildup, and then you sanitize to kill off any nasty bacteria. Nailing this full cycle is the only way to guarantee your machine runs smoothly, cranks out crystal-clear ice, and keeps the health inspector happy.
Why Clean Ice Is Your Restaurant's Secret Weapon

In the non-stop grind of the Los Angeles food scene, clean ice isn't a luxury—it's the foundation of quality. Whether you're slinging tacos from a popular Mexican Food truck or crafting pies at an iconic Los Angeles Pizza joint, the quality of your ice says a lot about your operation. For many customers, it's the first and last thing they taste.
Letting your ice maker go is a direct hit to your bottom line. A dirty machine is just asking for a failed health inspection, a sudden and costly repair bill, and patrons who are immediately put off by cloudy, funky-tasting ice. High-quality restaurant equipment is an asset you simply can't afford to neglect.
The LA Challenge: Hard Water and Busy Kitchens
Restaurants here in the greater LA area have a couple of unique hurdles to clear. Southern California is infamous for its hard water, packed with minerals like calcium and magnesium. This stuff builds up fast as scale inside your ice machine, slowly choking its components and tanking its efficiency. Think of it like plaque in an artery; it forces the whole system to work harder and drives up your utility bills.
But it’s not just the water. The very air in a busy kitchen can be a problem. Airborne gunk is everywhere, especially in operations like Los Angeles Food Trucks where space is tight and grills are always firing.
- Grease and oil particles from the line float around and settle on your ice maker's parts.
- Yeast and flour dust from a station prepping pizza dough can get sucked right into the machine's air intake.
- Plain old dust and debris are just a fact of life in any high-traffic spot.
All these particles mix together to create a sticky film that becomes a perfect breeding ground for slime, mold, and bacteria. Regular cleaning isn't just a chore; it’s your frontline defense against the realities of our environment.
When you reframe routine maintenance as a strategic investment, you stop just reacting to problems and start proactively preventing them. This protects your restaurant equipment, guarantees a better customer experience, and ultimately safeguards the financial health of your restaurant.
More Than Just a Cleaning Task
At the end of the day, how you maintain your ice maker is a direct reflection of your commitment to quality and safety. In the fast-paced world of Los Angeles restaurants, where ice is the unsung hero in every cold drink, a neglected machine can turn a great night into a total disaster. While the FDA requires a minimum of two cleanings a year, most experts will tell you to aim for quarterly cleanings to keep things running right.
Thinking about the bigger picture, it's not just about the ice. It's about a culture of cleanliness. That means regular training for your team on everything, including how to conduct effective health & safety audits and compliance. This kind of comprehensive approach ensures every corner of your operation, from the walk-in to the front door, is held to the highest standard.
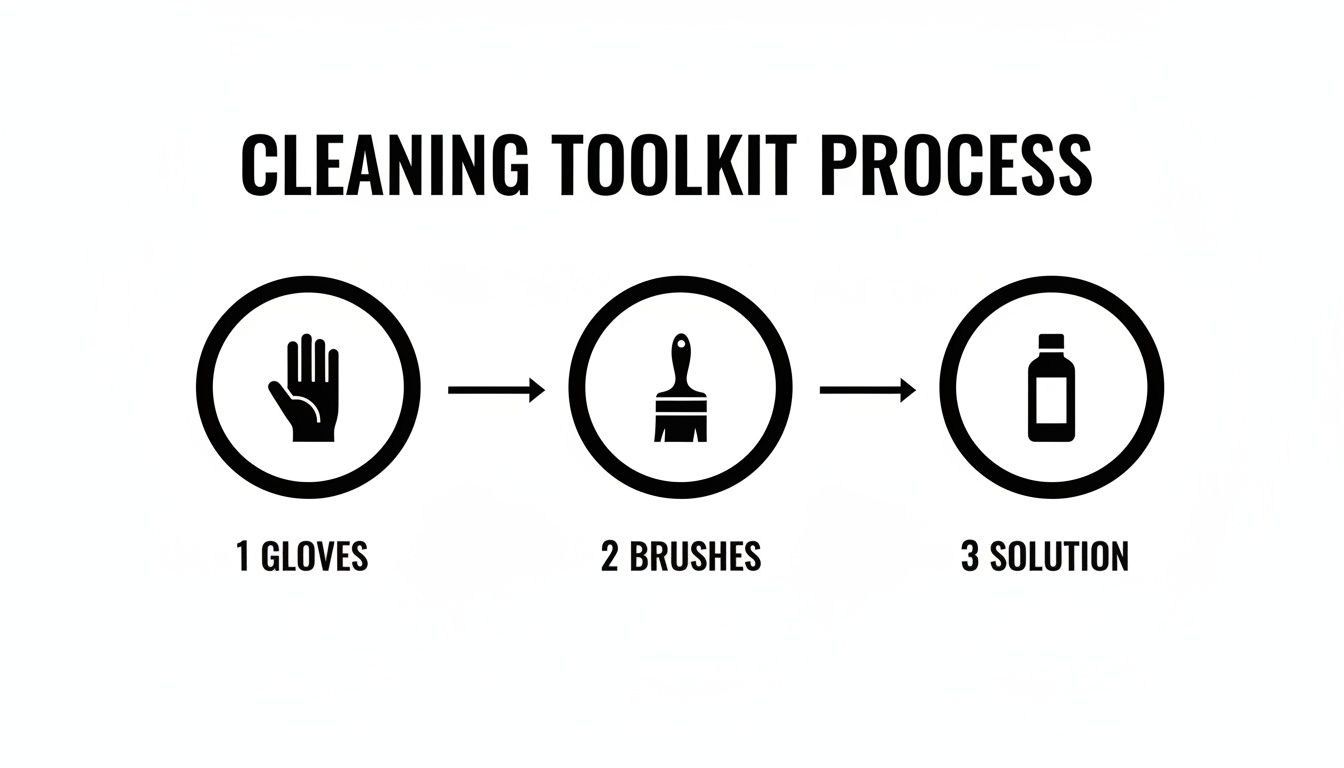
Gathering Your Commercial Cleaning Toolkit
Walking into an ice maker cleaning unprepared is like one of the top Los Angeles Food Trucks hitting the dinner rush with an empty prep table—it’s a recipe for chaos and wasted time. Before you even think about unplugging that machine, you need to get your gear in order. Having everything on hand from the jump turns a painful chore into a smooth, efficient process.
Think of it as your mise en place for maintenance. You wouldn't start a service without your ingredients lined up, so don't start cleaning without your toolkit ready to go. This simple step ensures you can work safely and effectively without scrambling mid-job to find a brush or the right cleaning solution.
Your Essential Cleaning Checklist
Your first priority is always safety. You're dealing with chemicals and electrical equipment, so personal protective equipment (PPE) is absolutely non-negotiable. After that, it’s all about having the right tools to get into every single nook and cranny.
Here’s what every LA kitchen should have ready:
- Personal Protective Equipment (PPE): This means waterproof gloves and safety glasses. Chemical splashes are a real risk, and your hands and eyes are too valuable to mess with.
- Soft-Bristled Nylon Brushes: Whatever you do, never use steel wool or abrasive pads. They will permanently scratch the interior surfaces, creating tiny hiding spots where bacteria and slime can thrive. A set of different-sized nylon brushes will be your best friend for tackling tight corners and delicate parts.
- Lint-Free Cloths: Microfiber cloths are ideal here. They wipe down surfaces without leaving behind tiny fibers that can clog up your machine's guts.
- Spray Bottles and Buckets: Grab a couple of spray bottles and buckets and label them "ICE MAKER ONLY." This is a simple but critical step to prevent cross-contamination from other cleaning tasks in your restaurant.
Pro Tip: Before you start, have a large, clean ice chest or a few Cambros standing by. You can transfer any good, usable ice into them to minimize service disruption. This keeps your bar or line stocked while the machine gets its deep clean.
Choosing the Right Chemicals
This is probably the most critical part of your toolkit, and it’s where I see a lot of restaurant operators make expensive mistakes. The chemicals for descaling and sanitizing are not interchangeable, and using the wrong one can absolutely destroy your restaurant equipment.
And speaking of first steps, if you're just getting set up, we have a whole guide on the initial installation process. Check out our article on connecting an icemaker to a water line.
- Descaler: This is an acidic solution formulated to dissolve mineral buildup—that chalky white scale that LA's hard water is famous for. It is vital to choose a nickel-safe descaler if your machine has nickel-plated evaporator plates. Using a harsh, unapproved acid will corrode these expensive parts, landing you a massive repair bill.
- Sanitizer: After the descaler has stripped away the grime, the sanitizer’s job is to kill any leftover bacteria, slime, and mold. This has to be an EPA-approved, food-safe sanitizer. Bleach is not a substitute; it can damage sensitive components and leave behind harmful residues you don't want anywhere near your ice.
Always—and I mean always—consult your ice maker’s manual. The manufacturer will list the approved cleaning products that are guaranteed to be safe and effective for your specific model. Using anything else is a gamble that could void your warranty and cut the life of your machine short.
The Complete Descaling and Sanitizing Walkthrough
Alright, let's roll up our sleeves and get into the nitty-gritty. This is your playbook for a full-blown descaling and sanitizing cycle. I've broken it down into simple, actionable steps so anyone on your team—from the head chef at a Mexican food spot to a crew member on one of the many Los Angeles Food Trucks—can get it done right. The goal is to keep your machine humming, your health inspector happy, and your ice sparkling clean.
Before you even think about touching the machine, we need to talk safety. You're dealing with a mix of electricity, water, and some pretty potent chemicals, often in the chaos of a busy kitchen. Let's do this safely.
First Things First: Safety and Prep
The very first thing you do, no exceptions, is disconnect the power. Don't just flip the switch to "Off." Go to the wall and pull the plug, or better yet, find the right circuit breaker and shut it down completely. This is the only surefire way to prevent an accident.
Next, kill the water supply. There's usually a small valve on the line running into the back of the machine. Turn it off. Taking these two simple precautions eliminates the risk of electrical shock or the machine kicking on while your hands are inside.
Now for the ice. Get a scoop and empty the entire bin. Toss it all. Even if it looks perfectly fine, it's been sitting in the environment you're about to deep clean. It’s also a great time to make sure the bin's drain isn't clogged and is flowing freely.
Getting your gear—gloves, brushes, and the right solutions—lined up beforehand makes all the difference. It turns a potential headache into a smooth, streamlined process.
Disassembly and Manual Scrubbing
With the bin empty, it’s time to start taking apart the internals. Most modern commercial machines are designed for this, with components that pop or slide out without needing a toolbox. Your user manual is your best friend here, but generally, you'll be removing parts like:
- The water curtain or baffle plate
- The ice thickness sensor (be gentle with this one!)
- The water distribution tube
- The water trough or sump
Once those are out, you'll get a real look at the state of your machine. This is where you'll see that scale and slime we've been talking about. Mix up your descaling solution in a bucket, following the manufacturer's directions, and submerge all the removable parts.
Now, get to scrubbing. Use your soft-bristled brushes to manually scrub every single surface you can reach inside the machine. Pay special attention to the evaporator plate (where the magic happens and ice forms) and any corners or seams where gunk loves to hide. Give the parts soaking in the bucket a good scrub too, using smaller brushes to poke out any clogs in the distribution tube holes.
Insider Tip: Don't skip the manual scrub. I see people do it all the time—they just pour in the solution and hit "Clean." That automated cycle is for flushing, not for breaking up months of heavy, caked-on buildup. The elbow grease you put in now makes the machine's cleaning cycle infinitely more effective.
For us here in Los Angeles, this step is non-negotiable. Our hard water is brutal on restaurant equipment. If you want to get ahead of the problem and drastically cut down on how often you have to do this, it's worth looking into choosing a whole house water softener system.
Running the Automated Cleaning Cycle
After you’ve scrubbed everything down, carefully put all the components back where they belong. Now, you can let the machine take over for a bit.
Nearly every commercial ice maker has an automated cleaning function—a button that says "Clean" or "Wash." Check your manual, then pour the recommended amount of descaling solution right into the water trough.
Kick off the cleaning cycle. The machine will now pump that descaler through its entire system, dissolving mineral deposits in places you could never reach, like the internal tubing and water pump. This cycle usually takes anywhere from 20 to 45 minutes. Just let it do its thing.
Once the descaling cycle is done, the machine will drain the solution. It's absolutely critical to run a thorough rinse cycle next to get all that acidic descaler out before you move on to sanitizing.
To help you keep these two crucial processes straight, here's a quick breakdown:
Descaling vs Sanitizing What Restaurant Owners Need to Know
| Process | Primary Purpose | Chemicals Used | Target |
|---|---|---|---|
| Descaling | Removes mineral buildup (limescale) from hard water. | Acid-based descaling solution (nickel-safe). | Hard, chalky deposits on evaporator plates, tubes, and sensors. |
| Sanitizing | Kills bacteria, mold, mildew, and other microorganisms. | Food-safe, EPA-approved sanitizer solution. | Invisible biological contaminants (slime, biofilm) in the water system. |
Remember, descaling tackles the visible crust, while sanitizing kills the invisible germs. You need to do both, in that order.
The Final Sanitizing Step
With the scale gone, it's time to wipe out any lingering bacteria or slime. Grab your food-safe sanitizer.
You'll repeat the process, adding the correct amount of sanitizer to the water trough and activating the cleaning cycle again. The machine will circulate the sanitizer through all the same pathways, killing off any nasty microorganisms that were hiding out.
The sanitizing cycle is often a bit quicker than the descaling one. When it finishes, the machine will do one last purge and rinse to flush everything out.
Let all the surfaces air dry completely. Don’t wipe them down with a towel—you’ll just reintroduce contaminants. Once it's dry, you can turn the power and water back on.
As a final quality check, let the machine run and make one or two full batches of ice, then throw that ice away. This ensures any trace chemical residue is completely gone, leaving you with nothing but pure, clean, perfect ice for your customers.
Building a Realistic Cleaning and Maintenance Schedule

Running through a full descaling and sanitizing cycle feels great, but let's be honest, it's not a one-and-done job. The real secret to keeping your ice maker humming along isn't that one heroic deep clean; it’s all about consistency. A solid, repeatable maintenance schedule is what separates a reliable workhorse from a ticking time bomb of expensive repairs and, even worse, failed health inspections.
Building this schedule isn't about giving your team more work. It’s about breaking down a monster task into small, manageable habits. This approach stops tiny issues from spiraling into the kind of major breakdown that always seems to happen during a Friday night rush.
Creating Your Daily, Weekly, and Quarterly Rhythm
A good schedule has layers. You’ve got the quick daily tasks that take seconds, the weekly checks that require a bit more focus, and the deep dives that are absolutely non-negotiable.
Here’s a practical breakdown that works for any busy Los Angeles Pizza parlor or Mexican Food restaurant:
- Daily Habits (2 Minutes): Think simple visual checks and wipe-downs. Give the exterior, handles, and scoop a quick wipe with a food-safe sanitizer. Take a peek into the bin to make sure no debris, straws, or bottle caps have fallen in.
- Weekly Checks (10 Minutes): This is your early warning system. Empty the ice and inspect the bin walls for any hint of slime or discoloration. You'll also want to check that the water and air filters aren't visibly caked with dust.
- Quarterly Deep Clean (1-2 Hours): This is the full-blown descaling and sanitizing mission we just walked through. It’s the only way to tackle the hidden gunk and scale that daily and weekly checks can't touch.
The goal isn't perfection; it's consistency. A simple cleaning log posted right on the machine is a powerful tool. It creates accountability and turns a vague idea into a concrete, trackable task for your whole crew.
For more pro tips on keeping your restaurant equipment in top shape, check out our guide covering commercial ice machine maintenance. It’s packed with actionable advice for proactive owners.
Adjusting Your Schedule for the LA Environment
A standard schedule is a solid start, but the unique conditions here in Southern California mean you can't just set it and forget it. A few local factors will likely force you to clean your ice maker more often.
Hard water is the silent saboteur in SoCal's commercial kitchens. It leaves behind that chalky scale buildup that chokes ice makers and quietly drives up energy bills. In places like Los Angeles, our water hardness often tops 150-200 mg/L of calcium carbonate. That means mineral deposits can accumulate 30-50% faster here than in soft water regions, forcing busy bars and restaurants to do a full cleaning every 3-4 months instead of the standard six.
The Overlooked Maintenance Tasks
Beyond the main cleaning cycle, a couple of smaller tasks often get forgotten, but they are absolutely vital for your machine's health and efficiency.
Cleaning the Air Filter
If you have an air-cooled machine—and most restaurants do—it has an air filter that acts as its lungs. It pulls in air to cool the condenser, and in a bustling kitchen, it gets clogged with grease, dust, and flour fast. A dirty filter suffocates the machine, forcing it to work harder, use more energy, and eventually burn out. Pull it out and clean it at least once a month. It’s usually as simple as rinsing it in the sink and letting it dry completely.
Replacing the Water Filter
That inline water filter is your first line of defense against sediment and minerals. But over time, it gets saturated and stops working. A clogged water filter not only fails to protect your machine but also restricts water flow, which is why you might start seeing smaller, misshapen, or cloudy ice cubes. Check the filter's recommended replacement schedule—usually every six months—and stick to it like glue.
Solving Common Ice Maker Issues Yourself
Even the most babied ice machine is going to have an off day. Before you pick up the phone and resign yourself to a hefty service bill, it's worth playing detective for a few minutes. A surprising number of common ice maker problems we see in busy LA kitchens are directly tied to cleaning and can be fixed on the spot.
Think of this as your first line of defense. When you learn to connect a symptom—like your ice production suddenly dropping off—to its likely cause, you can jump on it right away. It saves you money, sure, but more importantly, it prevents a small hiccup from derailing a packed dinner service.
Downtime from a dirty machine isn't just a headache; it’s a direct hit to your bottom line. In the competitive LA restaurant scene, a single day without a functioning ice maker can easily cost an independent spot $5,000-$10,000 in lost sales. Staying on top of cleaning is the best way to prevent issues like biofilm from crippling your ice output. You can find more great insights on protecting your restaurant's performance on saniprofessional.com.
Tackling Weak or Slow Ice Production
It’s one of the most common complaints we hear: the machine just can't keep up anymore. If your ice bin is looking a little sparse, don't panic. Nine times out of ten, the culprit is a simple blockage cutting off either air or water flow.
Start with the most obvious offender—the air filter. In a real working kitchen, especially one with a charbroiler or a bank of deep fryers, the air is thick with grease and dust. All that grime gets sucked straight into your ice maker’s air filter, slowly suffocating the condenser.
- The Fix: Pop out the air filter. If it's coated in a layer of grey gunk, you’ve probably found your problem. A good wash with warm, soapy water is usually all it takes to open up the airflow and get your production humming again.
If the filter looks clean, your next suspect is the water filter. A clogged water filter is like a kink in a hose; it slows the water getting into the machine, which means there's less raw material available to make ice.
Why Your Ice Is Cloudy, Small, or Misshapen
Good ice is crystal clear and perfectly formed. The moment you start seeing cloudy, soft, or undersized cubes, it’s a red flag that something’s up with your water system. This is a huge issue for many Los Angeles restaurants, thanks to our notoriously hard water.
This problem almost always points back to one of two things: a water filter that’s completely saturated and not doing its job, or a serious layer of scale buildup on the evaporator plate.
When minerals from our hard water build up on the evaporator, it messes with the whole freezing process. The water can't freeze evenly, which gives you those ugly, misshapen cubes that melt way too fast and can even make drinks taste a little funky.
The Fix: If it’s been a while, swap out your water filter cartridge right away. Next, run a full descaling cycle just like we outlined earlier. That will dissolve all the mineral gunk on the evaporator, letting the water freeze into the clean, solid cubes your customers expect. For a deeper dive, check out our guide on what to do when your ice machine is not making ice.
Eliminating Strange Odors and Tastes
Nothing kills a vibe faster than a customer complaining that their drink tastes "off." If you trace that taste back to the ice, you have to act immediately. A musty or mildewy smell coming from your ice bin is a code-red situation.
This is a direct sign of biological growth—slime, mold, or mildew—hiding out somewhere inside the machine. It loves to grow in the bin, on the water curtain, or deep inside the water distribution tube. Just descaling won't touch this; you have to sanitize.
The Fix: A full sanitizing cycle is non-negotiable. Get in there and manually scrub every single interior surface, paying extra attention to corners and tight spots. Then, run the automated sanitizing cycle. This will kill off the organic contaminants causing the odor and ensure your ice is clean, fresh, and completely tasteless—exactly how it should be.
Your Ice Maker Cleaning Questions Answered
Even with a perfect plan, things come up in the middle of a busy service. To wrap things up, let's tackle some of the most common questions we hear from Los Angeles Food Trucks and restaurant owners across the city. Getting these answers right helps you stay on top of maintenance and protect your investment in crucial restaurant equipment.
How Do I Know I'm Using the Right Cleaner for My Ice Machine?
Your first and best resource is always the machine's user manual. Ice maker brands are incredibly specific about the chemicals that are safe for their components, especially those delicate evaporator plates where the magic happens.
If your machine has nickel-plated parts, you have to use a "nickel-safe" descaler. Using the wrong kind of acid can literally eat away at the metal, causing permanent and very expensive damage. For sanitizers, look for ones that are EPA-approved and clearly marked as food-safe. And whatever you do, never use bleach. It will corrode metal parts and can leave behind nasty residue you don’t want anywhere near a customer's drink.
Can I Use Vinegar Instead of a Commercial Descaler?
It’s a tempting thought, especially since it works on a coffee maker at home. But for a commercial machine, vinegar just doesn't have the muscle to break down the heavy mineral deposits we see around here. Professional descaling solutions are formulated to obliterate the stubborn lime scale that Southern California's hard water leaves behind.
Using an unapproved cleaner like vinegar isn't just less effective; it could also void your manufacturer's warranty. It’s a risk that’s just not worth taking for a piece of restaurant equipment this vital. Stick with the products recommended by the pros.
When Should I Stop DIY and Call a Professional?
Knowing your limits is the name of the game. Regular cleaning is on you, but some problems are clear signs that it's time to get a certified technician on the phone.
You should stop what you're doing and call for service if:
- The machine still isn't making ice after you’ve run a full cleaning cycle.
- You hear any loud grinding, squealing, or knocking noises.
- You see any signs of a refrigerant leak, like oily residue or a chemical smell.
- The automated "Clean" or "Sanitize" cycle won't start, run, or finish properly.
Even when everything seems to be running smoothly, an annual professional check-up is just smart business. A good tech can spot small electrical or mechanical issues before they turn into a full-blown emergency that shuts you down.
How Does SoCal Hard Water Affect My Cleaning Schedule?
The hard water across Southern California is a game-changer. It massively speeds up how fast scale builds up inside your machine. If you're running a spot anywhere in LA, you absolutely cannot follow the standard six-month cleaning schedule you might read about online. It’s not enough.
You’ll need to perform a full descaling and sanitizing clean far more often—probably every 3 to 4 months. The warning signs are easy to spot: your ice starts looking cloudy, and you'll see a white, chalky film building up on the internal parts. For any restaurant in Los Angeles, investing in a commercial-grade water filtration system designed to combat scale is one of the smartest moves you can make.
Whether you're opening a new Mexican food restaurant, managing a fleet of Los Angeles food trucks, or just upgrading the restaurant equipment in your Los Angeles pizza place, LA Restaurant Equipment has the reliable, warranty-backed gear you need at warehouse-direct prices. Get the performance you demand with fast, free shipping across Southern California.
Explore our full range of commercial kitchen equipment now at https://larestaurantequipment.com.