

Hooking up your commercial icemaker correctly starts long before you ever touch a wrench. It’s all about gathering the right tools, finding a reliable cold water source, and knowing your machine’s specific needs inside and out. For Los Angeles restaurants, from busy pizza parlors to popular food trucks, a dependable ice supply is non-negotiable. This foundational work guarantees you'll have a steady supply of ice and helps you avoid those disastrous, service-slowing leaks down the road.
A little smart prep work upfront is what separates a smooth, one-and-done job from a day full of headaches.
Your Pre-Installation Game Plan
Before you even think about connecting a hose, you need a solid game plan. Think of this as your pre-flight checklist, whether you're running a bustling LA food truck or a high-volume Mexican restaurant downtown. A bit of planning now will save you from those infuriating mid-job runs to the hardware store that can kill an entire afternoon.
This isn’t just a simple hookup. You're building a critical system for your kitchen that needs to be dependable. Getting it right means steady ice production and one less thing to worry about during a busy dinner rush, no matter if you're slinging pizzas or brewing coffee.
Assess Your Plumbing and Equipment Needs
First things first: find the nearest cold water line. You'll usually spot one under a sink or as a dedicated stub-out pipe. Just make sure you can actually get to it easily and have enough space to work.
Next, you need to grab the icemaker's manual and actually read it.
One of the most common mistakes I see is operators completely ignoring the manufacturer's specs for water pressure. Most commercial icemakers are designed to run on water pressure between 20 and 120 PSI. If your pressure is too high or too low, the machine won't just work poorly—it could flat-out malfunction and even void your warranty.
Knowing these numbers is non-negotiable. You can easily check your restaurant's water pressure with a simple, inexpensive gauge that screws right onto any hose bib or faucet.
Gather Your Essential Tools and Materials
Having everything you need within arm's reach before you start is the pro move. A well-stocked kitchen is a well-run kitchen, and the right restaurant equipment is key to success for any Los Angeles food business, be it a pizza place, a food truck, or a Mexican restaurant. For this specific job, though, you’ll want a dedicated kit.
Take a few minutes to gather everything on this list. Trust me, it beats stopping everything to run out for a single fitting.
Essential Tools and Materials Checklist
| Item Category | Specific Tools/Materials | Pro-Tip |
|---|---|---|
| Cutting & Fitting | Pipe Cutter, Two Adjustable Wrenches | Use one wrench to hold the fitting steady and the other to tighten. This prevents twisting the line. |
| Sealing | Teflon Tape or Pipe Dope | Apply tape clockwise on male threads so it doesn't unravel when you tighten the fitting. |
| Mounting & Routing | Drill with Assorted Bits, Measuring Tape | For drilling clean holes through cabinets. Measure twice, drill once! |
| Water Line | Copper or Braided Stainless Steel Tubing | Copper is the gold standard for durability, but braided lines offer more flexibility in tight spaces. |
| Valves & Fittings | Shutoff Valve, Compression/Flare Fittings | Always install an accessible shutoff valve right at the connection point for easy maintenance. |
With your tools ready, you're set for a clean installation. The global ice maker market was valued at USD 3.02 billion in 2024, and every one of those machines relies on a solid water connection to function. For those of us operating in Southern California, using durable materials like copper or PEX tubing (copper is often twice as durable) is key for both hygiene and longevity.
If you’re new to this kind of work, checking out some general guides on appliance installation can give you a good dose of foundational knowledge before you dive in.
Selecting the Right Water Line and Fittings
Picking the right water line for your commercial ice machine is a lot like choosing the right tires for a delivery van—the decision you make now directly affects its performance and how long it lasts. In a busy kitchen, this is a big deal. You’re not just hooking up a water source for a machine you use once in a while; you're setting up a critical lifeline that has to perform under constant pressure, day in and day out.
The best material for connecting your icemaker to the water line really comes down to your specific kitchen setup. For instance, a Los Angeles food truck is constantly dealing with road vibrations, so the flexibility of braided stainless steel is a perfect fit. On the flip side, a permanent installation in a Mexican restaurant will benefit more from the rugged, long-term reliability of copper tubing.
Comparing Your Water Line Options
Each material has its own set of pros and cons. Copper is the old-school champ, famous for its durability and the fact that it doesn't kink easily. The downside? It's rigid, which can make it a real pain to install in tight corners or crowded spaces. Braided stainless steel lines, however, are super flexible, which is a lifesaver when you need to snake a line around existing restaurant equipment.
Then you’ve got PEX (cross-linked polyethylene), which has become a go-to in modern plumbing. It’s flexible, a breeze to cut, and does a fantastic job resisting scale buildup—a huge advantage if you're in an area with hard water.
- Copper Tubing: This is your most durable option. It’s ideal for permanent, straight-shot installations where the line won't ever need to be moved.
- Braided Stainless Steel: Incredibly flexible and simple to install. It's the perfect choice for tight spots or mobile setups like food trucks.
- PEX Tubing: A versatile and budget-friendly pick that gives you a good mix of flexibility and durability. It's also really easy to work with.
Ultimately, your choice depends on your kitchen’s layout, your budget, and how much ice you’ll be making. The good news is that the installation itself is usually pretty affordable. For most restaurants, installing a water line for an icemaker costs between $75 and $130. The final price will depend on the line material you choose and how far it is from the water source. You can discover more insights about project costs to help dial in your budget.
Understanding Your Fitting Choices
Once you’ve picked your tubing, you need the right fittings to lock it all down without any leaks. The two most common types you’ll run into are compression and flare fittings.
A compression fitting works by using a small ring, called a ferrule, that gets squeezed onto the tubing as you tighten a nut. This creates a watertight seal. A flare fitting is a bit different—you actually have to flare out the end of the tube before securing it. While compression fittings are faster for quick jobs, flare fittings generally create a more solid, vibration-resistant connection. That makes them a much better choice for high-pressure lines or equipment that gets moved around, like prep tables on wheels.
Making a Secure and Leak-Proof Connection
Alright, you’ve got your water line and all the right fittings. Now for the moment of truth: making the connection. This is where patience really pays off. A careful, methodical approach here will save you from the absolute nightmare of a slow leak ruining your floors, or worse, the equipment sitting next to your icemaker. Trust me, taking your time now is the key to a professional job that lasts.
First thing’s first, and this is non-negotiable: shut the water off completely. Find the main shutoff valve for your building or, if you're lucky, just for the cold water line you’re working on, and turn it clockwise until it's firmly closed. It's a good idea to open a nearby faucet to bleed out any pressure and drain the remaining water from the pipe. No one wants a surprise shower.
Tapping Into Your Cold Water Source
Your next job is to create a new access point on that cold water pipe. You've got a couple of ways to do this, but for a busy commercial kitchen, one is clearly better than the other.
You could use a saddle valve, which is a quick-and-dirty method that pierces the pipe. I'd strongly advise against it. A tee fitting is the far more reliable and professional choice. Yes, it means you have to physically cut the pipe and install the new fitting (either by soldering or using compression), but the result is a rock-solid connection that won’t fail you when you’re in the middle of a dinner rush at your Los Angeles pizza place.
Once that tee fitting is in place, go ahead and attach your new shutoff valve. This little valve is your best friend for any future maintenance.
Always install an accessible in-line shutoff valve right near the icemaker. This is often a local health code requirement in places like Los Angeles County and will save you from having to shut down your entire kitchen just to service the machine.
Think about it—filter changes, repairs, or even just replacing the machine becomes a simple task instead of a major plumbing project. It’s a small step that prevents huge headaches down the road.
Routing the Line and Attaching Fittings
Now, grab your tape measure. Carefully measure the distance from your new shutoff valve to the water inlet on the back of the icemaker. Here’s a pro tip: add a little extra length to your tubing. That slack is crucial. It prevents kinks in the line and makes it much easier to pull the machine out for cleaning and service without disconnecting everything.
When you route the line, be mindful of its path. Keep it away from sharp corners or any spots where it could get pinched or crushed by other heavy restaurant equipment.
This diagram gives a good overview of the decision-making process for choosing and installing your water line.

As you can see, whether you go with sturdy copper, flexible PEX, or a braided steel line, the core steps always come back to creating secure, leak-free connections.
Finally, it’s time to connect the fittings. If you’re using compression fittings, follow these steps exactly to get a perfect seal:
- First, slide the compression nut onto the tubing.
- Next, slide the ferrule (that’s the little brass ring) on after it.
- Push the end of the tubing all the way into the fitting on the valve or the icemaker until it stops.
- Slide the ferrule and nut down to meet the fitting, then hand-tighten the nut.
- Now, use two wrenches—one to hold the valve body still and one to turn the nut. Give it one full turn past hand-tight. That’s it. Over-tightening is a common mistake that can crack the ferrule and cause the very leak you're trying to prevent.
If you opted for flare fittings with copper tubing, you’ll use a flaring tool to create a cone-shaped end on the pipe. This method creates an incredibly strong, metal-to-metal seal that’s fantastic for high-pressure lines or in situations where equipment might vibrate, like in a food truck.
Once both ends are securely connected, you’re ready for the final checks.
Optimizing Water Quality and Pressure
Let's be honest: great ice begins with great water. In the hyper-competitive Los Angeles restaurant scene, you just can't serve cloudy, funky-tasting ice. The quality of your ice is a direct reflection of your entire operation, and two things stand between you and perfect cubes: filtration and pressure.
Think of proper water filtration as an essential insurance policy for your machine. An in-line water filter isn't just a "nice-to-have"—it's an absolute must for any piece of restaurant equipment connected to a water line. It's the shield protecting your icemaker’s delicate internal parts from scale and sediment, which is a massive headache here with Southern California's notoriously hard water.
When that gunk builds up, it clogs solenoids and freezes up evaporator plates. The result? Lower ice production, weirdly shaped cubes, and eventually, a big bill from the repair tech. Good filtration literally extends the life of your icemaker and keeps it humming along efficiently.
Managing Water Pressure for Peak Performance
Just as critical as water quality is water pressure. Every commercial icemaker has a sweet spot it's designed to work in, usually somewhere between 20 and 120 PSI. Go outside that range, and you're just asking for trouble.
You can check your restaurant's water pressure yourself with an inexpensive gauge from any hardware store; it just screws onto a hose bib. This five-minute test can save you from a world of hurt down the road.
- If Pressure Is Too High: Water pressure that blasts past the manufacturer's limit will wreck your icemaker's inlet valve. You're looking at leaks or even a total component failure.
- If Pressure Is Too Low: Not enough pressure means the machine is starved for water. You'll end up with thin, hollow, or incomplete ice sheets, and your production numbers will plummet.
If your pressure is too high, installing a regulator is the answer. It's worth taking a moment to understand what is a water pressure regulator because it’s a simple device that protects your expensive investment. On the flip side, if the pressure is too low, a booster pump can give it the kick it needs to keep your ice bin full.
A rookie mistake is assuming the city’s water pressure is steady. It’s not. It can jump all over the place, especially in busy commercial districts. Always check your pressure before you finish the installation—it will prevent the kind of performance nightmare that always seems to happen during the middle of a dinner rush.
Of course, none of this works without consistent maintenance, especially changing out those filters on schedule. If you want some solid guidance on keeping your machine in prime condition, you can learn more about how to clean a Manitowoc ice maker; many of those principles are universal across different brands. Nail both water quality and pressure, and you'll turn your icemaker into a reliable workhorse instead of a recurring problem.
Final Checks and Leak Testing Your New Setup
Alright, the lines are connected and the fittings feel snug, but don't call it a day just yet. This last part is where the real pros separate themselves from the rookies. It’s all about being meticulous now to prevent a tiny drip from turning into a full-blown flood and a water damage nightmare down the road. Trust me, rushing this final check is a classic mistake that can cost you thousands.
Before you even think about turning the water on, slide the icemaker into its final home. Make sure you've left that bit of extra slack in the water line behind it, just like we talked about. This is critical—it stops you from putting stress on the fittings every time you pull the machine out for cleaning.
The Slow-Turn and Inspection Process
Now for the moment of truth. Head over to that new shutoff valve and turn it on very slowly. I mean it—just a quarter turn is perfect to start. You want to let the pressure build up gradually, not hit the system with a sudden jolt. As you do this, listen. Any hissing is your first red flag for an immediate leak.
With the line pressurized, it's time to inspect every single connection point you made.
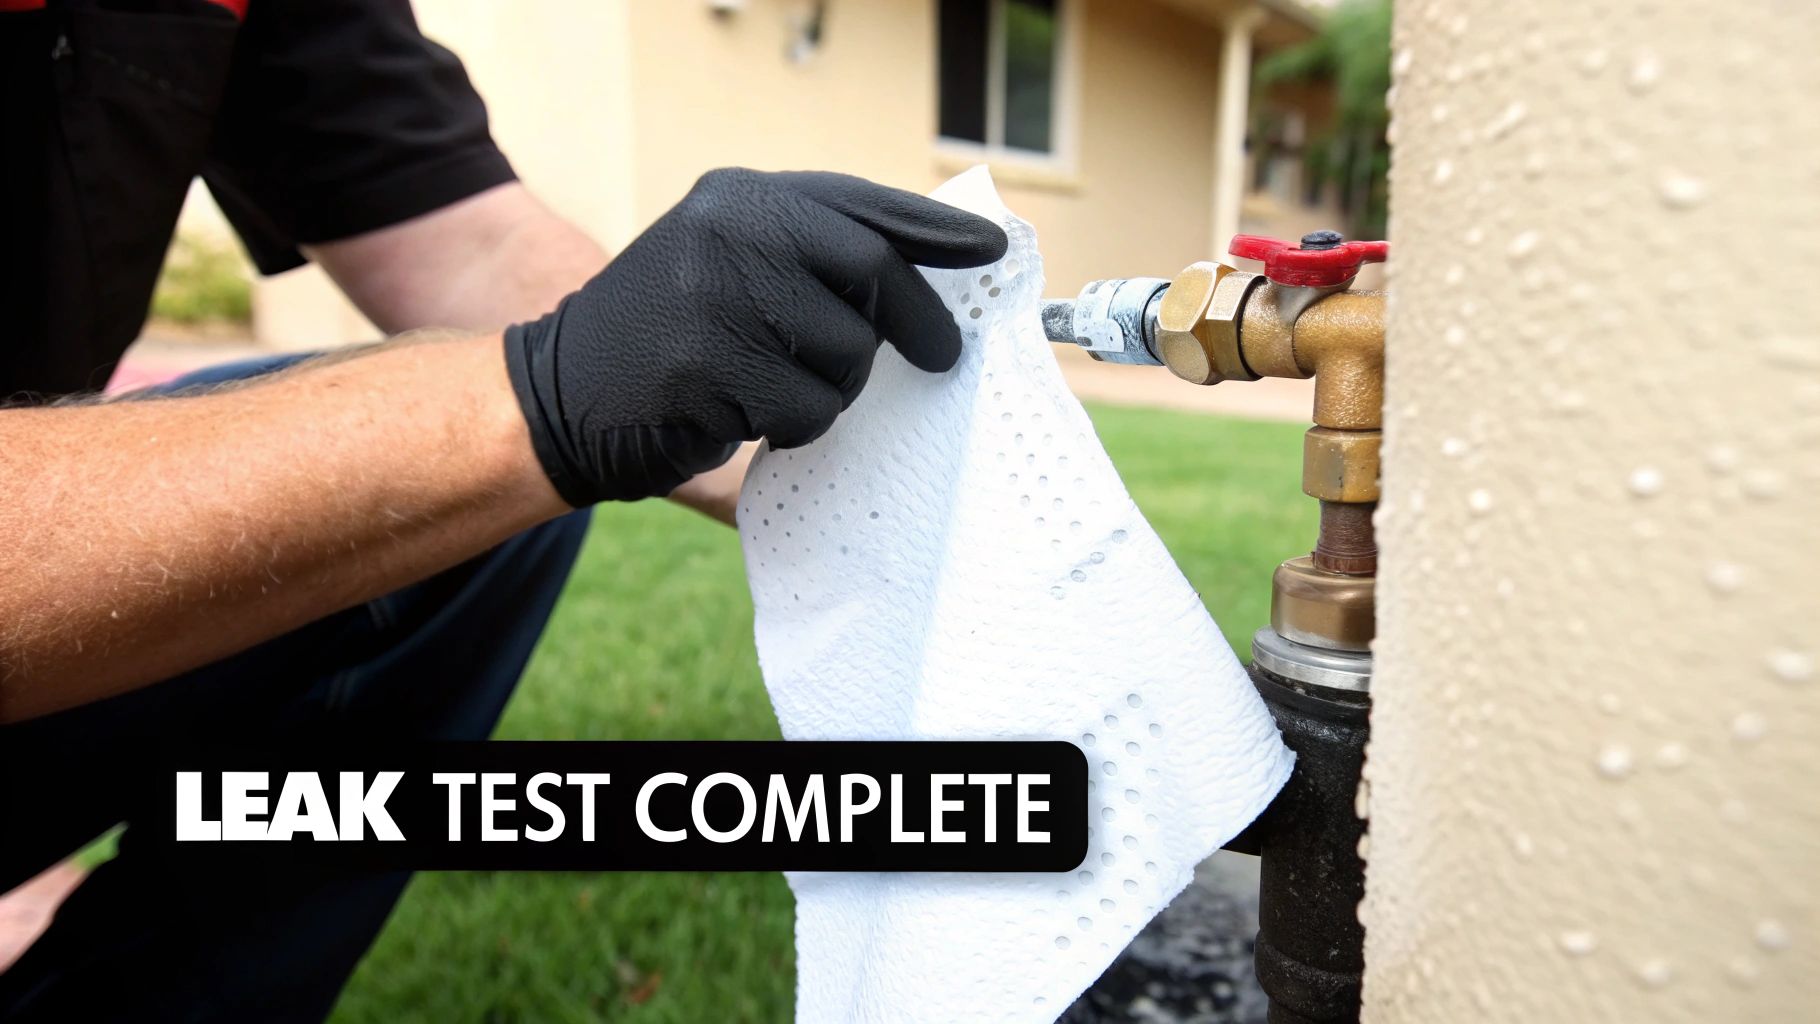
Here’s an old-school plumbing trick that never fails: grab a dry paper towel. Carefully wipe down every fitting, from the tee valve at the main line all the way to the machine's inlet. Even the tiniest bead of moisture, the kind you can't even see, will show up instantly on the white paper. It's a foolproof way to catch those sneaky, slow leaks.
If you spot any moisture at all, kill the water supply right away and take a closer look at that connection. Nine times out of ten, it’s either a nut that isn't quite tight enough or, on the flip side, a compression fitting that was over-tightened, cracking the ferrule.
Kicking Off the First Harvest Cycle
Once you’ve confirmed everything is bone-dry, go ahead and open the shutoff valve completely. Now, plug in the icemaker and fire it up to start its first harvest cycle. This is your final, real-world test.
You should hear a distinct click as the water inlet solenoid valve opens, followed by the sound of water filling the ice mold. That's the sound of success, confirming the machine is getting the water it needs. If the machine seems to be running but you're not getting any ice, our guide on troubleshooting why an ice machine is not making ice has some great pointers.
Let the machine run through one full cycle. Depending on your model, this could take anywhere from 15 to 40 minutes. The second you hear that first glorious crash of ice cubes dropping into the bin, you can officially say the job is done. These final checks give you the peace of mind that your new setup is solid, reliable, and ready for the daily grind of your Los Angeles kitchen.
Common Questions About Icemaker Installation
Even what seems like a simple installation can throw a few curveballs your way. When you're talking about something as essential as your restaurant's ice supply, you need good, straight answers. So, let's walk through some of the most frequent questions we hear from restaurant owners in Los Angeles when they're getting a new icemaker hooked up.
Nailing these details from the get-go means your machine will run like a champ from day one.
What Are the Most Common Mistakes to Avoid During Installation?
One of the biggest blunders we see is someone over-tightening compression fittings. It's a natural instinct—crank it down to make sure it won't leak, right? But doing that can actually crack the little brass ring (the ferrule) inside, which ironically causes the exact drip you were trying to prevent. A gentle, firm turn is all it takes.
Another common slip-up is forgetting to put a dedicated shutoff valve right near the icemaker. Sure, you have the main water valve somewhere else, but having this local shutoff is a game-changer for maintenance. It saves you from turning off the water to your entire kitchen just to swap out a filter.
A crucial step that gets skipped way too often is flushing the new water line before making that final connection. Tiny bits of plastic or copper from cutting the pipe can get blasted straight into your icemaker's inlet valve. This can cause an instant clog and leave you with a brand-new machine that barely works.
Finally, don't cheap out on the tubing. It's tempting to grab whatever is least expensive, but non-commercial-grade materials just can't handle the constant pressure and heavy use of a restaurant kitchen. You'll end up with premature leaks, kinks, and a frustrating breakdown right in the middle of a dinner rush.
How Often Should I Change the Water Filter in a Commercial Kitchen?
For a busy LA restaurant, bar, or food truck, a solid rule of thumb is to replace the in-line water filter every six months. This isn't just about the taste and clarity of your ice; it's also about protecting the internal components of your machine.
That said, your local water quality makes a huge difference. Here in many parts of Southern California, we've got notoriously hard water. That means you might need to change your filter more often—maybe every three or four months—to keep scale buildup from choking your machine.
The best way to know for sure? Trust your manufacturer's recommendation and your own eyes. If you notice your ice production slowing down or see the cubes getting cloudy, that's a dead giveaway your filter is clogged and needs to be replaced.
When Is It Time to Call a Professional Plumber?
While plenty of operators can handle a basic icemaker hookup, there are absolutely times when calling a licensed plumber is the smartest play. If you're not comfortable cutting into your main water line—especially if the pipes look old or corroded—it’s best to let a pro handle it.
The same goes for any installation that involves running the new water line through walls, ceilings, or floors. A professional will make sure it's done correctly, safely, and up to local building codes.
You should also bring in a professional if:
- You've finished the installation but are stuck with a stubborn leak you just can't track down.
- Your water pressure test comes back too high or too low. A plumber can install a regulator or booster pump to get it just right.
A pro brings the right tools and expertise for those tricky situations. It ensures the job is done right the first time and gives you the peace of mind that your equipment investment is protected.
For top-quality, warranty-backed commercial ice makers and other essential kitchen equipment, trust LA Restaurant Equipment. We offer warehouse-direct pricing and fast, free shipping to restaurants across Southern California. https://larestaurantequipment.com