

When your ice machine stops making ice, it's easy to assume the worst. But before you pick up the phone and prepare for a hefty repair bill, take a deep breath. More often than not, the culprit is something surprisingly simple—a tripped breaker, an accidentally flipped switch, or a water valve that got bumped closed. This is a common issue for all types of Los Angeles restaurants, from bustling pizza parlors to popular food trucks.
A few quick checks can often get you back up and running in minutes, saving you time, money, and a major headache during a busy service.
The First 5-Minute Triage
It’s the moment every restaurant manager dreads: reaching into the ice bin during a dinner rush and finding it empty. That silent, non-producing machine can feel like a disaster, but hold off on the panic. This is a crucial piece of restaurant equipment that needs immediate attention.
Let’s run through an initial five-minute diagnostic. This is designed to catch those common, simple issues that get overlooked in a hectic kitchen. Think of it as the quick triage you'd perform for any essential piece of equipment.

This immediate checklist is your first line of defense. These steps are straightforward, require zero special tools, and focus on ruling out the most frequent and easily solved problems.
To make this even easier, here’s a quick reference table your staff can use.
The First 5-Minute Diagnostic Checklist
| Check Point | What to Look For | Quick Fix or Next Step |
|---|---|---|
| Power Switch | Is the machine's power button or switch in the "ON" position? | Flip the switch to "ON." It's often located on the front panel and easily bumped. |
| Power Cord | Is the plug firmly seated in the wall outlet? | Push the plug in securely. Cords can get jostled during cleaning. |
| Circuit Breaker | Go to your electrical panel. Is the breaker for the ice machine tripped? | If tripped, reset it once. If it trips again, unplug the machine and call a pro. |
| Water Valve | Find the water supply line, usually behind the machine. Is the valve handle parallel to the pipe (open)? | Turn the handle so it's fully open. A partially closed valve will starve the machine of water. |
| Ice Bin Sensor | Is the bin full, or is ice blocking the bin sensor or harvest slide? | Level the ice in the bin or clear any obstructions. The machine thinks it's full. |
Completing these checks first can save you from unnecessary downtime and an expensive emergency service call. If you've gone through the list and the machine is still dead in the water, it's time to dig a little deeper.
Check Power and Basic Settings
The first place to look is always the most obvious: power. In a bustling Los Angeles kitchen, it's incredibly easy for a plug to get dislodged or a switch to be flipped by mistake.
- Is the machine plugged in and turned on? It sounds basic, but you’d be surprised how often this is the fix. Double-check that the cord is secure and the power switch is in the "on" position.
- Has a circuit breaker tripped? Head to your breaker panel. If the circuit for the ice machine is tripped, reset it one time. If it trips again right away, that's a red flag for a bigger electrical problem. Unplug the machine and call a professional.
Verify the Water Supply
No water, no ice. It’s that simple. Water supply issues are a leading cause of service calls, and I've seen it countless times in Los Angeles pizza restaurants and Mexican food establishments.
In fact, some reports show that water supply problems account for roughly 40% of all service calls for commercial ice machines. With North America dominating over 37.8% of the global market, that’s a lot of restaurants reporting downtime from this one issue. You can read more about industrial ice machine market trends here.
Key Takeaway: Always check the water valve first. It's almost always located on the wall behind the machine and can be accidentally knocked closed during cleaning or by staff moving in a tight space. Make sure that valve is fully open, allowing water to flow freely. This single check can prevent a completely unnecessary repair call.
Checking Airflow And Your Kitchen Environment
Alright, you've confirmed the machine has power and water. Now, let’s look at its surroundings. It might sound basic, but the environment around your ice machine is a massive factor, especially in the heat and chaos of a busy Los Angeles restaurant kitchen.
Think of your ice machine as a heat pump. It sucks the heat out of water to make ice, but all that heat has to go somewhere. If the machine can't get rid of that hot air, it'll protect itself by shutting down. This is a built-in safety measure to save the compressor—the heart of the machine and its most expensive part. Proper restaurant equipment placement is key.
This is one of the most common reasons an ice machine is not making ice, and thankfully, it's usually an easy fix.
Give Your Ice Machine Room to Breathe
The number one environmental killer for an ice machine is poor airflow. It absolutely needs space on all sides to pull in cool air and push out hot air. A machine shoved into a tight corner without ventilation is a machine that's going to fail. Period.
I see this all the time. In a packed LA kitchen, every square inch of floor space is gold. It’s tempting to squeeze the ice machine into a small alcove, but that’s a recipe for disaster. The unit just ends up breathing in its own hot exhaust, getting hotter and hotter until the high-temperature safety switch trips and cuts off production.
Rule of Thumb: Make sure there's a bare minimum of six inches of clearance around all sides of your ice machine. This isn't a friendly suggestion; it's a hard-and-fast rule for the machine to work properly.
This simple bit of spacing lets cool air get to the intake and hot air escape, keeping the whole system from overheating. The numbers don't lie: overheating is behind roughly 30% of all operational failures in air-cooled ice machines. One of the biggest names in the game, Scotsman Ice Systems, found that improper ventilation—less than 6 inches from a wall—is the culprit in 62% of overheating cases for their built-in models.
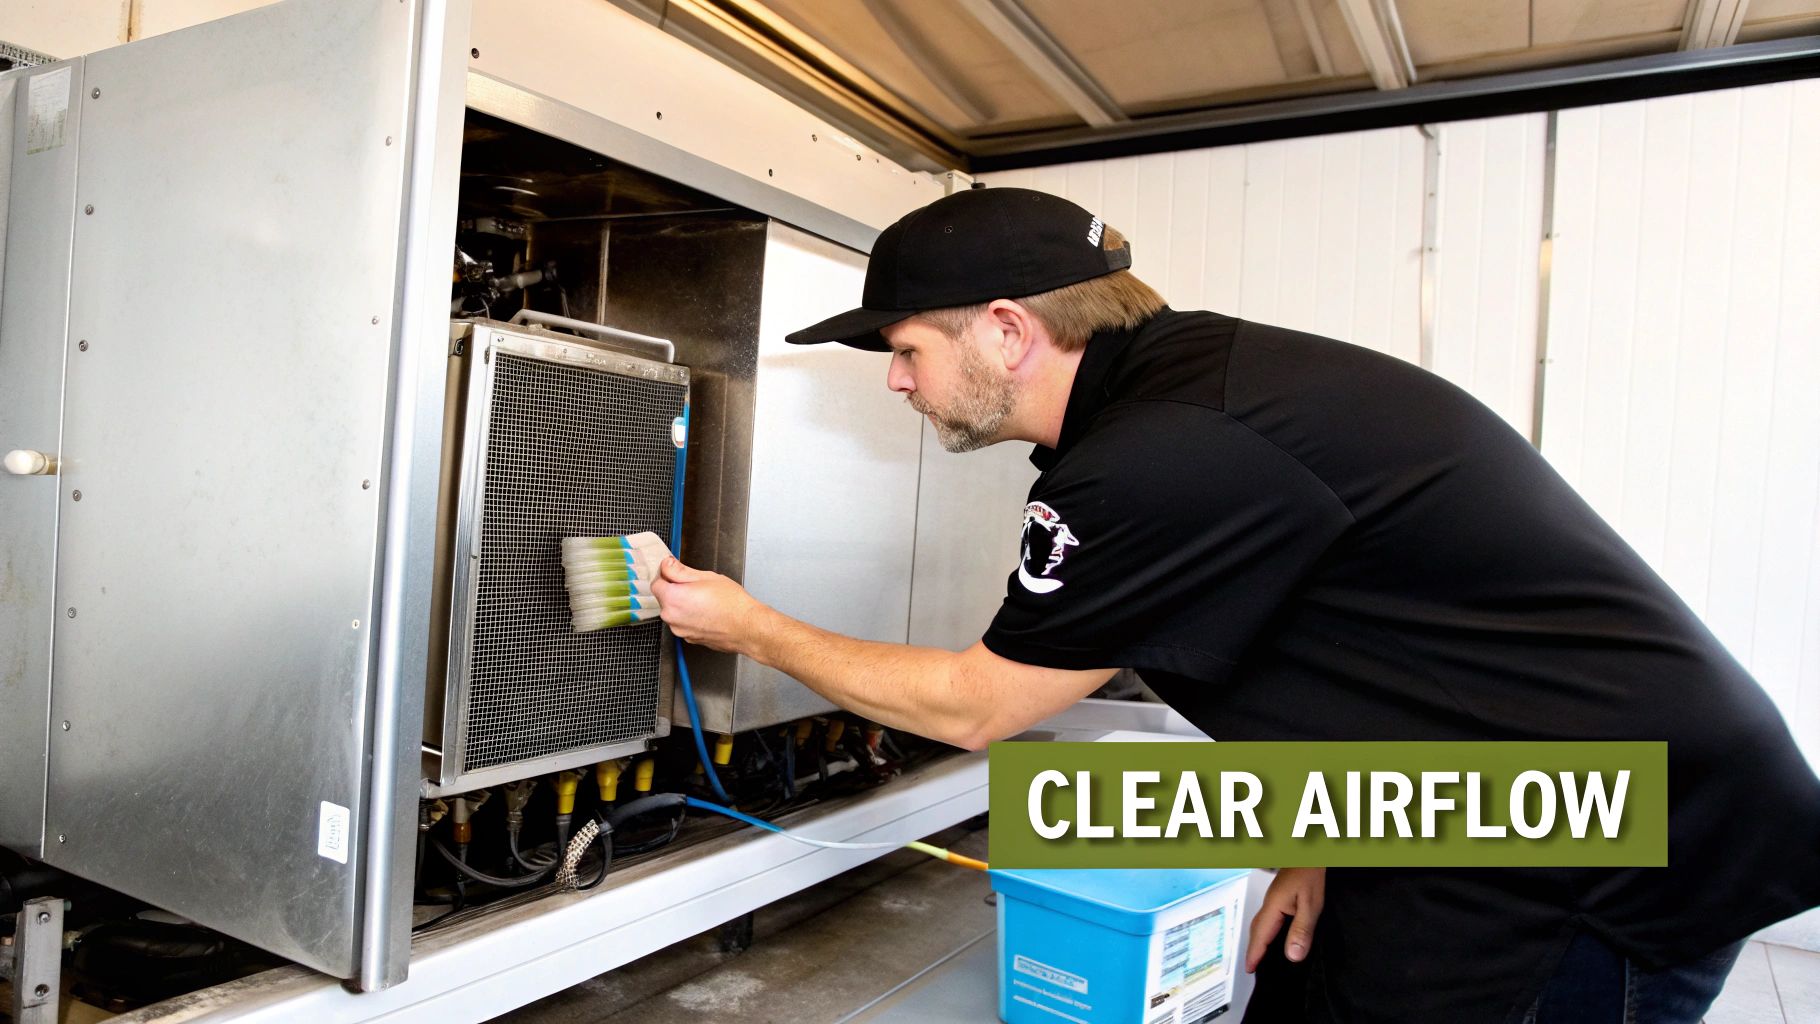
Clean Your Condenser Coils and Filters
Even if you give it enough space, airflow can still get choked off by the grease, dust, and flour that fill a commercial kitchen's air. This gunk gets sucked into the machine and cakes onto the condenser coils and air filters, essentially wrapping them in an insulating blanket.
When these parts are clogged, the machine has to work overtime just to cool down. You'll notice it running longer, your energy bills will creep up, and eventually, it will overheat and shut down completely.
Here's how to check and clean these critical components:
- Find the Air Filter: Most units have a filter that slides out easily from the front or side. It’s made to be cleaned regularly.
- Wash the Filter: Pull it out. If it’s covered in grime, it’s strangling your machine. A quick wash with warm, soapy water and a good rinse is all it needs. Just make sure it's bone dry before you put it back.
- Inspect the Condenser Coils: Unplug the machine first! Then, grab a flashlight and peek through the vents at the coils (they look like a radiator). If you see a layer of fuzzy dust, it's time to clean. A soft brush or a shop vac with a brush attachment works perfectly to gently remove the buildup.
For a Los Angeles food truck, this is a weekly ritual. Sitting on a hot street all day, the machine is constantly pulling in road dust and exhaust. A five-minute filter clean can be the difference between serving a line of thirsty customers and having an ice machine not making ice during the lunch rush.
Proper placement and routine cleaning aren't just good habits—they're vital for your machine's health and performance. A smart kitchen layout can head off these problems from day one. You can learn more about optimizing your space in our guide to commercial kitchen layout and design.
Investigating The Water And Refrigeration Systems
Alright, if checking the room temperature and airflow didn't get the ice flowing, it's time to roll up our sleeves and look under the hood. When an ice machine is not making ice, the problem almost always lies within one of two core systems: water or refrigeration. Things get a bit more technical here, but having a solid grasp of these components can help you diagnose the issue like a pro.
Think of your ice machine's water system as the plumbing for your whole restaurant, just on a smaller scale. The main valve behind the unit is just where the journey begins. From that point, water has to travel through filters, valves, and a network of lines before it even gets a chance to hit the evaporator plate and become ice. Any clog or hiccup along this path will bring production to a dead stop.
Following The Water Trail
First, let's play detective and trace the water's path from the main supply. Just because the main valve is open doesn't mean water is actually getting where it needs to go. Several internal parts can fail and choke off the supply.
A very common villain, especially here in Los Angeles with our hard water, is the water filter. Over time, these filters get clogged solid with sediment and scale buildup. A badly clogged filter can slow the water flow down to a pathetic trickle, effectively starving your machine. As a rule of thumb, you should be swapping out that cartridge filter every six months, no exceptions.
Another key player is the water inlet solenoid. This is basically an electric gatekeeper that opens to let water into the machine right when the ice-making cycle kicks off. If you don't hear a distinct "click" or the sound of rushing water a few moments after the machine powers on, that solenoid might be shot.
Pro Tip: Grab a screwdriver and gently press the handle against the body of the solenoid valve. If it's working, you should feel a subtle vibration or hear a low hum when it’s supposed to be open. Dead silence usually means you've found your problem—either a failed valve or an electrical issue telling it what to do.
Signs Of Refrigeration Trouble
If you've confirmed water is flowing properly, your next suspect is the refrigeration system. This is the heart of the operation, the powerhouse that generates the freezing cold temperatures needed to make ice. A word of caution: these systems are complex and often best left to a licensed technician. Still, you can gather some valuable clues just by paying attention.
Listen to the compressor. Is it even running? A compressor that’s completely silent is a huge red flag. It could be an electrical failure or, worse, a seized motor. On the flip side, a compressor that runs constantly but never gets the machine cold points to a whole different set of problems, like a refrigerant leak.
Low refrigerant or a leak is a major issue, accounting for 20-25% of no-ice scenarios, especially in machines that have been around for more than five years. It's a common story we hear from hospitality businesses across North America. Catching these leaks early with regular maintenance can save you a fortune in repair costs.
A tell-tale sign of a leak is an oily residue on the copper refrigeration lines. That oil circulates with the refrigerant, so where you see oil, you have a leak.
Finally, look for ice where it shouldn't be. It sounds strange, but frost buildup on the wrong parts can stop ice production in its tracks. If you see ice caked onto the water lines or evaporator coils, it could be a sign of poor airflow or a low refrigerant charge. Understanding how this works in other cooling systems can be really helpful. For instance, knowing what causes AC coils to freeze and how to fix it can give you a much better handle on what might be going wrong with your ice machine.
Understanding The Ice Making And Harvest Cycle
So, your ice machine is on, but the bin is empty. What gives?
More often than not, the machine isn't completely busted. It's usually just stuck, endlessly repeating one part of its job without being able to finish. Every ice machine runs on a simple two-act play: the freeze cycle (making the ice) and the harvest cycle (dropping it into the bin). If it can't complete both acts, the curtain never falls, and you get no ice. Learning to spot which part of the cycle is failing is the key to fixing it yourself.
I've seen it happen countless times. A bustling restaurant in the middle of a dinner rush suddenly runs dry on ice. The machine is humming along, looking busy, but producing nothing. The manager is pulling their hair out. By simply watching the machine for a few minutes, you can figure out exactly where it's getting tripped up.
It all starts with water flowing over a super-chilled evaporator plate, where it freezes one thin layer at a time. Once the ice slab is thick enough, the machine flips a switch, gently warming the plate just enough for the ice to slide off into the bin. A hiccup anywhere in that process brings production to a dead stop.
Observing The Freeze Cycle
First, let's see if it's even trying to make ice. Pop open the door to the bin and turn the machine on. You’re looking for two things to happen within the first few minutes.
You should hear and see water start to flow over the evaporator plate—that metal grid where the ice cubes form. If nothing's moving, you’ve got a water problem. Next, carefully place your hand near the plate (don't touch it!). You should feel the cold radiating off it as the refrigeration system starts working its magic.
It's a simple process of elimination. If water is flowing but the plate stays warm, you're looking at a refrigeration issue. If the plate gets frosty but there’s no water, you've confirmed it's a water supply problem.
Where The Harvest Cycle Can Fail
What if the machine makes a perfect, full sheet of ice but just sits there with it? That sheet of ice is just stuck, and your problem is with the harvest cycle. This is probably one of the most common reasons an ice machine is not making ice. A few different parts need to work in perfect harmony to get that ice to drop, and if any one of them messes up, the whole show stops.
This flow chart gives you a great visual for where to start looking. Always start with the simple stuff, like the water filter, before you start worrying about the big components like the compressor.
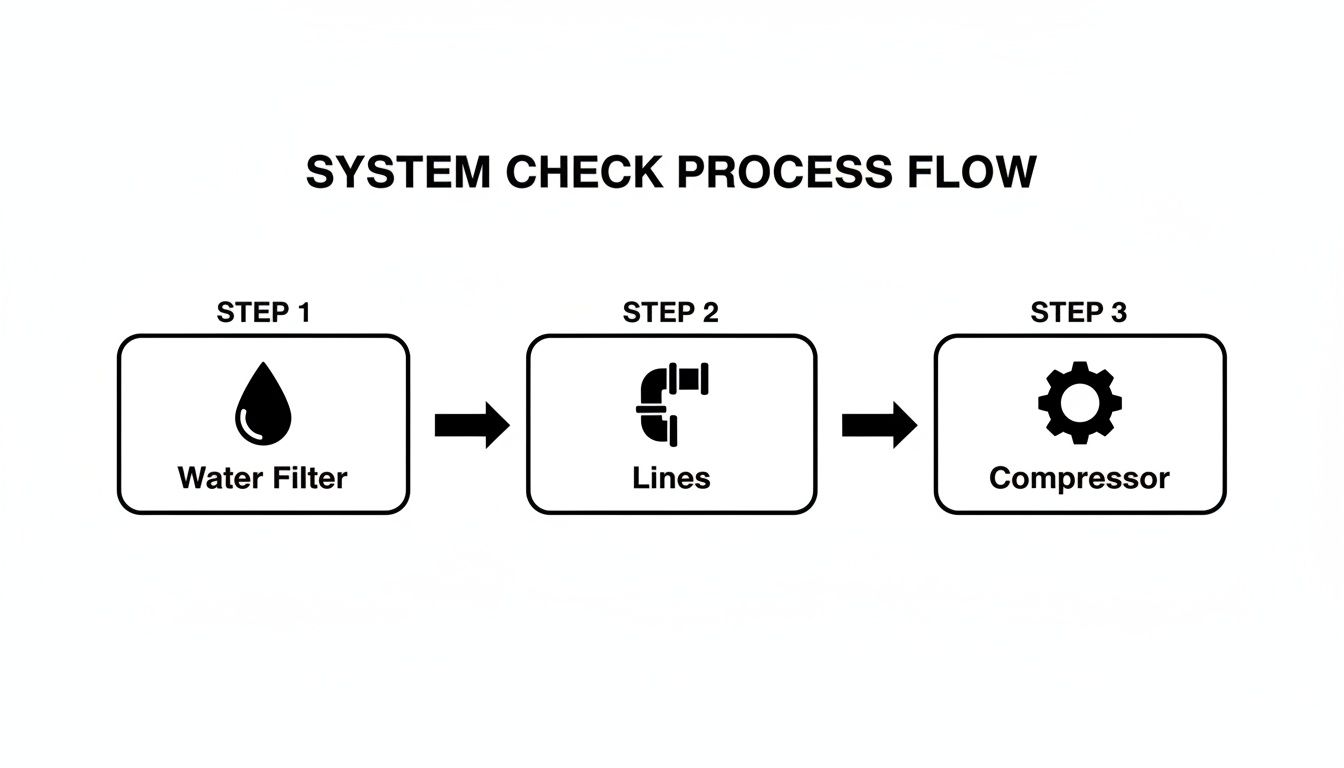
When the harvest cycle fails, it's usually one of these culprits:
- Dirty Ice Thickness Probe: This little sensor is the machine's brain, telling it when the ice is thick enough to harvest. If it's caked with limescale, it can't "see" the ice and will never give the signal to drop it.
- Faulty Hot Gas Solenoid: To release the ice, the machine sends a bit of hot refrigerant gas to the evaporator plate to warm it up. If the valve that controls this (the solenoid) is busted, the plate stays frozen, and the ice sheet is glued in place.
- Stuck Harvest-Assist Mechanism: Some machines have a little arm or set of pins that give the ice a gentle push to help it fall. If that mechanism is broken or jammed, the ice won't have the help it needs to break free.
To help you figure out what’s going on just by watching and listening, here’s a quick diagnostic table.
Diagnosing Ice Cycle Failures
| Symptom | Potential Problem Area | Likely Cause |
|---|---|---|
| Machine runs, but no water flows over the plate. | Water System | Clogged filter, closed shutoff valve, or bad inlet valve. |
| Water flows, but evaporator plate doesn't get cold. | Refrigeration System | Low refrigerant, faulty compressor, or fan motor issue. |
| A full sheet of ice forms but never drops. | Harvest Cycle | Dirty thickness sensor, bad hot gas solenoid, stuck mechanism. |
| Machine runs for an abnormally long time. | Freeze or Harvest Cycle | Could be either—low water flow or inefficient refrigeration. |
Just by paying attention to the sounds and sights, you can narrow down the issue significantly before you even pick up a tool.
Key Takeaway: Your watch is your best friend here. A typical freeze cycle should take about 10-20 minutes. If you see your machine has been running for an hour with a full sheet of ice on the plate, you can be 100% sure you have a harvest cycle failure on your hands.
Building A Proactive Maintenance Routine
Let's be honest, reacting to a dead ice machine during a dinner rush is a nightmare. It's stressful, it's expensive, and it's almost always avoidable. For any Los Angeles restaurant owner, whether you're running a bustling downtown pizzeria or a fleet of food trucks, the smartest move is to stop the problem before it starts. This is a vital part of managing your restaurant equipment.
Think of it this way: you wouldn't drive a delivery van for 20,000 miles without an oil change. Your ice machine is just as vital, cranking away 24/7 to keep drinks cold and customers happy. A simple, consistent maintenance routine isn't just another chore; it's an investment that pays for itself in avoided downtime and longer equipment life.
Your Daily and Weekly Maintenance Checklist
Consistency is everything. These aren't big, time-consuming jobs. They're quick tasks you can fold into your daily opening or closing procedures until they become second nature for your kitchen staff.
Daily Tasks (Takes Less Than 5 Minutes):
- Wipe Down Exterior Surfaces: Grab a food-safe cleaner and give the outside of the machine, the handles, and the ice scoop a quick wipe. This is basic food safety and prevents cross-contamination.
- Check the Ice Bin: Just glance inside. Give the ice a quick stir to make sure it’s not clumping into a giant iceberg. Check that the bin sensor or curtain isn't blocked.
- Look and Listen: Does everything sound right? Is ice dropping like it should? Catching a weird noise early can be the difference between a minor fix and a major failure.
Weekly Tasks (Set Aside 10-15 Minutes):
- Clean the Air Filter: This is absolutely non-negotiable. A clogged filter is one of the top reasons these machines overheat and die. Slide it out, wash it with warm, soapy water, let it dry completely, and pop it back in.
- Sanitize the Storage Bin: Empty all the ice. Follow your manufacturer's instructions to clean and sanitize every inside surface. This stops the slime and mold that health inspectors love to find.
The Semi-Annual Deep Clean
Twice a year, your ice machine needs a little more love. This is when you get inside and tackle the gunk that builds up, especially with Southern California's notoriously hard water.
Mineral scale is the silent killer of ice machines. Every time water turns to ice, it leaves behind calcium and magnesium deposits on the evaporator plate. This scale acts like an insulator, forcing the machine to run longer and harder to freeze the next batch. Eventually, components just give up.
Expert Insight: Descaling isn't optional; it's essential. A machine that gets a regular deep clean produces clearer, better-tasting ice, uses less energy, and is far less likely to quit on you during a summer heatwave.
If you're serious about protecting your equipment, a water softener can be a game-changer. For restaurant owners looking to protect their investment, understanding and choosing a whole house water softener system can massively extend the life of an ice machine.
Here's your twice-a-year playbook:
- Run a Descaling Cycle: Use a nickel-safe ice machine descaler. Never use bleach or harsh chemicals. Just follow the instructions in your manual to run the solution through the system and dissolve all that mineral buildup.
- Run a Sanitizing Cycle: After you've descaled and rinsed, run an EPA-approved sanitizer through the machine. This kills off any lingering bacteria, algae, or slime.
- Replace the Water Filter Cartridge: Don't even think about it, just do it every six months. An old filter doesn't just stop working; it can restrict water flow and become a breeding ground for bacteria.
- Inspect Key Components: With the machine off and unplugged, do a quick visual check. Look for cracks in the water lines, make sure electrical connections are tight, and see if the condenser coils are caked with dust or grease.
For a bigger-picture look at keeping all your equipment in top shape, check out our guide on commercial kitchen equipment maintenance.
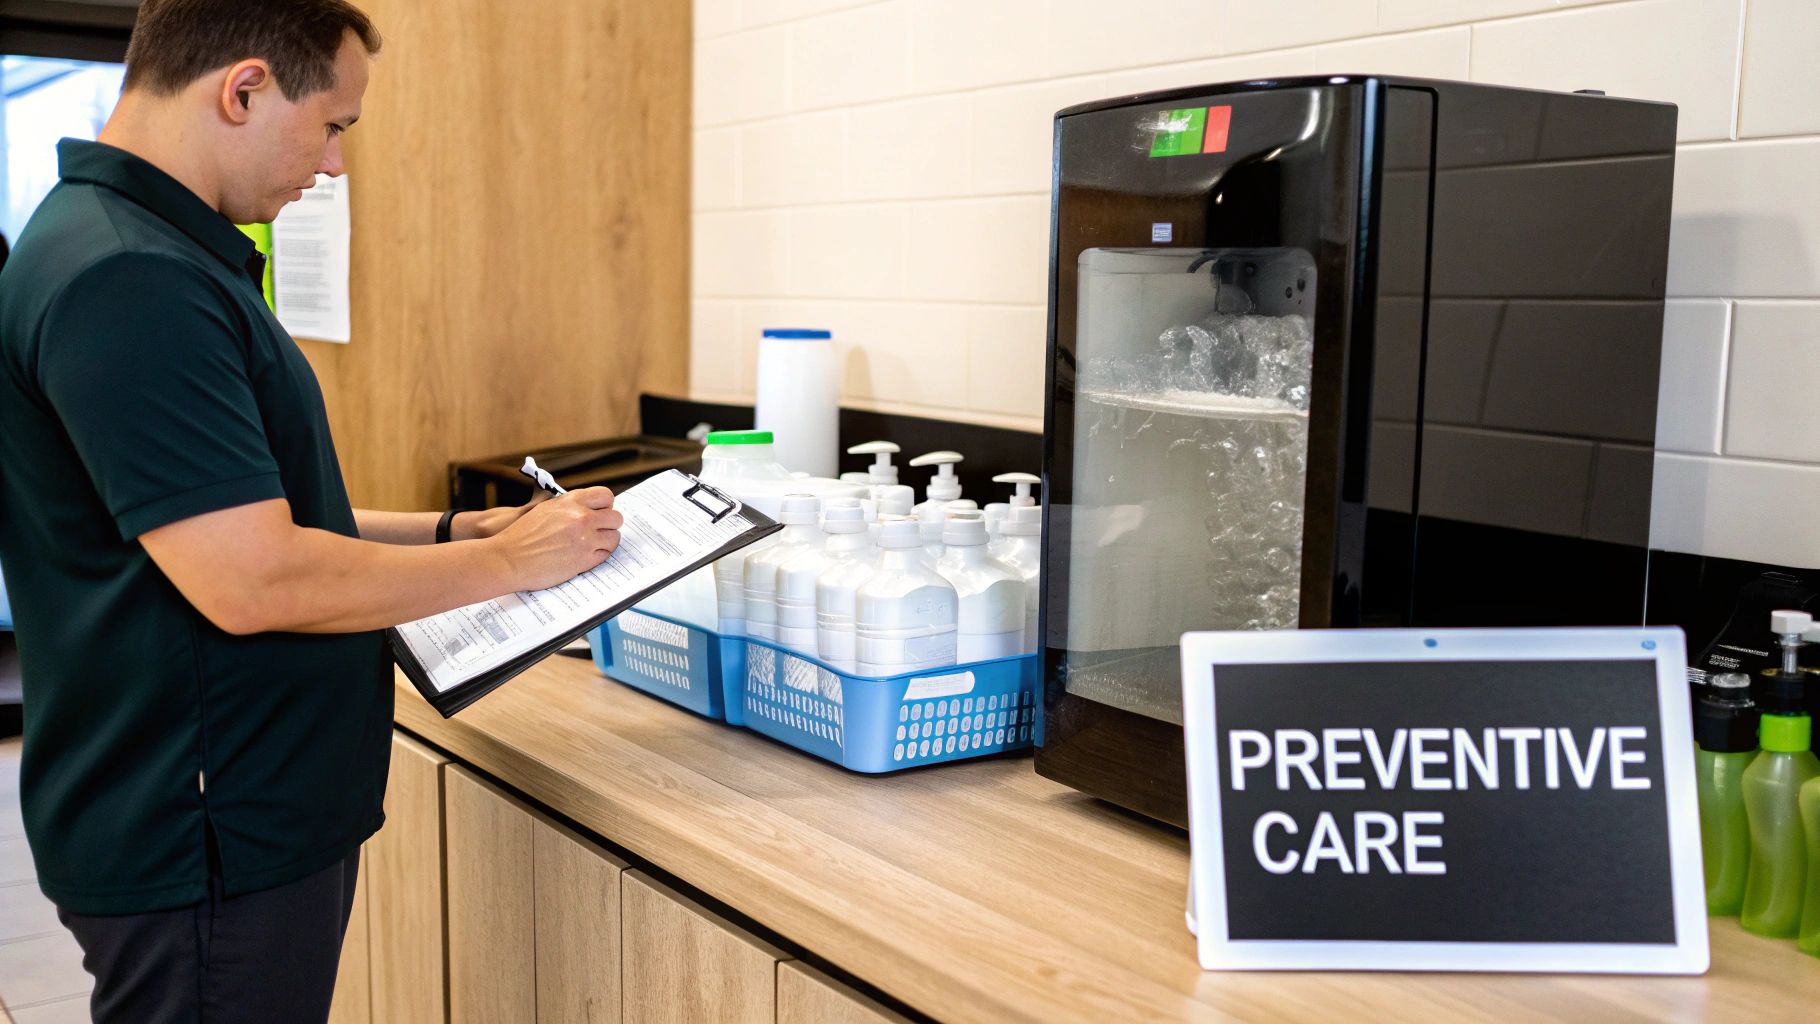
Creating a Simple Maintenance Log
The last piece of the puzzle is accountability. A simple checklist posted near the machine makes sure these tasks actually get done. You don't need anything fancy; a clipboard works perfectly.
- List each task ("Clean Air Filter," "Sanitize Bin," etc.).
- Add columns for the date and the initials of the staff member who did it.
This simple log does two things: it builds a routine and gives you a record for health inspectors or a service tech if they ever need to see it. It turns good intentions into a real, trackable process that protects your investment.
Common Questions We Hear When an Ice Machine Breaks Down
When your ice machine is not making ice, a million questions probably start racing through your mind. How much is this going to set me back? What went wrong? And most importantly, how fast can this get fixed? For busy restaurant owners across Los Angeles, getting straight answers quickly is the key to making the right call without lighting money on fire.
We've been in this business a long time, and we've heard it all. Here are the most common questions we get from operators of pizza joints, taco shops, and food trucks when they're staring at an empty ice bin. Whether it's a Los Angeles pizza spot, a popular food truck, or an authentic Mexican food restaurant, these concerns are universal.
How Much Does An Emergency Ice Machine Repair Cost In Los Angeles?
Let's be upfront: an emergency service call in the LA area isn't cheap. The moment you make that call, you can expect a dispatch or diagnostic fee, which usually runs between $150 and $250. This fee typically just covers the technician’s drive time and their first hour on-site figuring out what’s wrong.
After they’ve diagnosed the issue, you’re looking at hourly labor rates of $100 to $200 per hour, plus whatever the replacement parts cost.
- A simple fix, like swapping out a bad water inlet valve or a sensor, will probably land you in the $250-$400 ballpark.
- A major repair, like replacing a compressor or tracking down a refrigerant leak, can easily soar past $1,500.
This is exactly why we always tell people to run through the basic troubleshooting steps first. You don't want to pay a hefty call-out fee just to have a technician flip a switch you missed.
Can I Just Use Any Cleaner On My Commercial Ice Machine?
Absolutely not. We see this all the time, and it's a costly mistake. Grabbing unapproved cleaning chemicals like bleach or a random household descaler can do permanent damage to your machine's sensitive parts. The nickel-plated evaporator, where the ice actually forms, is especially vulnerable and can corrode or start flaking.
Even worse, these chemicals can leave behind toxic residue that gets into your ice—a massive health hazard for your customers.
Safety First: Always stick to a food-safe, nickel-safe ice machine cleaner for getting rid of scale buildup. For sanitizing, use a separate, EPA-approved sanitizer. Your machine’s manual is your bible here; it will tell you exactly which products the manufacturer recommends to keep things safe and avoid wrecking your equipment.
My Machine Is Making Small Or Cloudy Ice. What Gives?
Think of small or cloudy ice as your machine’s cry for help. It’s not just a cosmetic problem; it's a clear sign that something is wrong. If you ignore it, you’re headed straight for a complete shutdown where the ice machine is not making ice at all.
Here’s a quick breakdown of what those symptoms usually mean:
- Small, Thin, or Incomplete Cubes: This nearly always points to a water problem. The culprit is often a clogged water filter, a water valve that isn't fully open, or an ice thickness probe that’s dirty and needs recalibrating.
- Cloudy or Soft Ice: This is the classic signature of mineral buildup from hard water. It means your machine is way overdue for a good descaling. Those trapped minerals don't just look bad; they can also make the ice melt faster and give it an off-taste.
Catching these issues early with regular maintenance is your best defense against a catastrophic failure. Of course, if you're constantly fighting with an older unit, checking out the newer Los Angeles ice makers might be a more reliable long-term fix.
When Should I Give Up And Call A Pro?
Knowing when to throw in the towel is just as important as knowing how to troubleshoot. It protects you, your staff, and your bank account. While many issues are DIY-friendly, some problems are strictly for the licensed professionals. Stop what you're doing and pick up the phone if you run into any of these:
- You Suspect a Refrigerant Leak: If you hear a hissing sound or spot an oily film on the copper lines, that's a red flag. Refrigerant is hazardous stuff, and only certified technicians are allowed to handle it.
- Loud, Scary Mechanical Noises: Any intense grinding, clanking, or squealing from the compressor or other motors is a sign of serious mechanical failure. Shut the machine off immediately to prevent it from completely destroying itself.
- The Breaker Keeps Tripping: If you reset the circuit breaker and it just keeps tripping, you have an electrical short or overload somewhere in the system. Don't mess with it—that's a fire hazard and requires a professional.
Trying to tackle complex refrigeration or electrical problems on your own isn't just dangerous; it can also void your warranty and turn a manageable repair into a complete replacement.