

The heart of any successful Los Angeles restaurant isn't just the food on the plate—it's the operational engine humming just behind the dining room doors. A smart commercial kitchen layout design is probably the single most important factor that dictates your efficiency, keeps your staff safe, and ensures your food quality stays high.
Frankly, it's the blueprint that determines if your service is smooth and seamless or pure chaos. This directly hits your bottom line, day in and day out. Whether you're launching a classic Los Angeles pizzeria, a fleet of agile Los Angeles food trucks, or a vibrant Mexican food spot, the right layout and restaurant equipment are non-negotiable.
Your Blueprint for a Profitable Kitchen
A well-planned commercial kitchen layout goes way beyond just finding a spot for the fryer and the range. It's about creating a purposeful environment where every single element works in harmony. This is true whether you're outfitting a brand-new Mexican restaurant, a high-volume Los Angeles pizzeria, or trying to maximize every last square inch in a food truck.
A thoughtful design minimizes how much your staff has to run around, prevents dangerous cross-contamination, and gets rid of service bottlenecks before they even have a chance to start.
Think of it as choreographing a dance for your culinary team. The real goal here is to create a logical, step-by-step flow from the second ingredients are delivered to the moment a finished dish is plated and sent out. This initial investment in operational excellence pays you back every single day through less stress, faster ticket times, and a much safer workspace for your crew.
Before we dive into the nitty-gritty of laying out your space, let's look at the core ideas that every great kitchen design is built on. These principles are the foundation for creating a workspace that is not only efficient but also safe and adaptable for the future.
Core Principles of Kitchen Layout Design
| Principle | Description | Impact on Your Business |
|---|---|---|
| Workflow Optimization | Creating clear, logical paths for staff, food, and supplies to move from one station to another without collision or backtracking. | Reduces ticket times, minimizes staff fatigue, and prevents accidents. A smooth flow means faster service and happier customers. |
| Menu-Driven Design | Selecting and placing equipment based specifically on the dishes you plan to serve. Your menu dictates your hardware, not the other way around. | Ensures you have the right tools for the job, preventing bottlenecks at key stations and improving food quality and consistency. |
| Safety & Compliance | Adhering strictly to all local health, fire, and building codes, including proper ventilation, fire suppression, and sanitation stations. | This is non-negotiable. It ensures a smooth opening, avoids costly fines, and, most importantly, protects your staff and guests. |
| Future Flexibility | Designing a layout that can adapt to future menu changes, an increase in volume, or new equipment without requiring a complete overhaul. | Saves you massive headaches and money down the road. An adaptable kitchen allows your business to grow and evolve. |
Getting this foundation right involves a lot more than just good intuition. It demands a serious, honest look at your menu, your projected customer volume, and the physical walls of your space.
This strategic approach to kitchen design isn't just a local trend; it's a global shift. The market for these services was valued at a massive $20.5 billion in 2023 and is expected to climb to nearly $33 billion by 2032. Why? Because more and more owners recognize that a smart layout is a core business asset, not just an afterthought.
Ultimately, a superior layout is a long-term investment. Yes, the initial costs for professional design and quality equipment can be significant, but exploring options for financing restaurant equipment can make this critical first step much more manageable. Getting the layout right from the start is one of the best ways to set your business up for sustained success.
Designing Your Kitchen's Workflow and Zones
A profitable kitchen moves like a well-oiled machine, not a demolition derby. The secret sauce? A logical workflow built around specific zones, creating a smooth path from raw ingredients coming in the back door to finished plates going out to the dining room. This strategic approach to commercial kitchen layout design is everything, whether you're mapping out a bustling Mexican food restaurant in Los Angeles, a popular LA pizza spot, or squeezing every last inch out of a food truck.
When you think through the entire process from start to finish, you slash wasted steps, prevent dangerous cross-contamination, and build a kitchen that’s just plain safer and more organized. The goal is to get your team moving with purpose, not panic. It’s not just about making life easier; it’s about speed, safety, and turning out a consistent product.
This visual shows exactly how smart design choices snowball into a better bottom line.
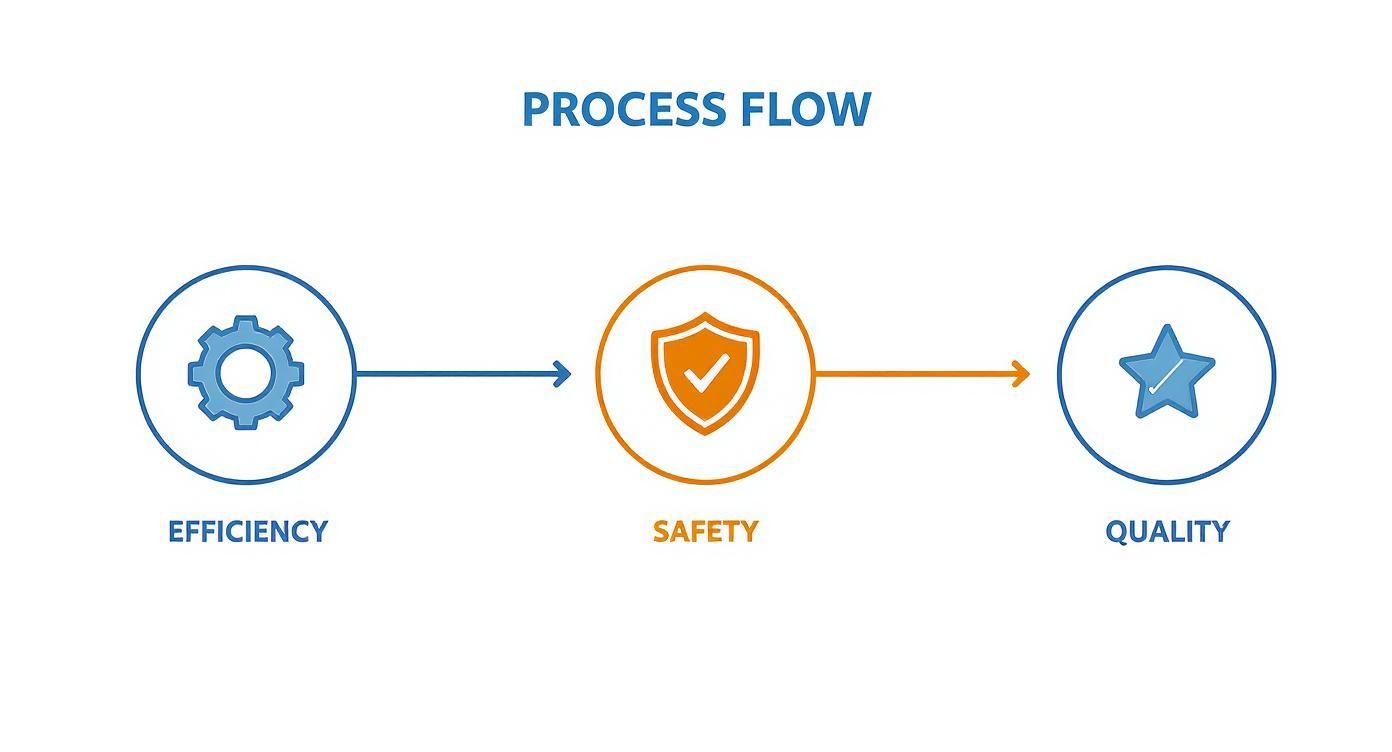
It’s a simple progression: an efficient layout creates a safer kitchen, and a safer kitchen empowers your crew to produce higher-quality food, every single time.
The Five Critical Kitchen Zones
No matter the size or concept, every commercial kitchen performs five core functions. Building your layout around these zones is non-negotiable—it prevents bottlenecks and keeps clean and dirty tasks from ever crossing paths.
- Receiving and Storage: This is where it all begins. Your receiving area has to be right next to a delivery entrance so you can hustle products into dry storage, walk-in coolers, or freezers. Good shelving and a strict first-in, first-out (FIFO) system are your best friends here.
- Preparation: Raw ingredients get washed, chopped, and portioned in this zone. You absolutely need separate areas for raw meats and produce to kill any chance of cross-contamination. Think prep tables, dedicated sinks, and all the specialized tools your cooks need.
- Cooking Line: This is the heart of the operation, where the action happens. The layout of your cooking equipment—your ranges, fryers, griddles, and ovens—should be a direct reflection of your menu and the speed of your service.
- Service and Plating: The final stop before the food makes its debut. This zone needs ample space for plating, garnishing, and a pass-through window or pickup area so servers aren’t dodging cooks on a hot line.
- Warewashing: The dish pit. This area is for dirty dishes only and must be kept far away from any food prep. It needs a three-compartment sink, a commercial dishwasher, and drying racks, all set up for a logical flow from dirty drop-off to clean storage.
Choosing a Layout Style for Your Concept
How you arrange these zones is dictated entirely by your menu and the four walls you're working with. A high-volume Los Angeles pizza joint has completely different needs than a mobile food truck serving Mexican food.
- Assembly Line Layout: This is the go-to for high-volume concepts where the food is made in a straight line—think pizzerias, food trucks, or quick-service spots. Stations are set up in sequence from prep to cooking to service, making the workflow incredibly fast and efficient. For a pizza restaurant, this means a flow from dough prep, to topping station, to the oven, to the cutting and boxing area.
- Island Layout: Perfect for larger kitchens with multiple chefs working at once. The main cooking equipment is grouped in a central island, with prep, storage, and washing stations hugging the perimeter walls. It's fantastic for communication and a great fit for chef-driven concepts.
- Zone-Style Layout: You'll see this in big operations like hotels or catering kitchens that are juggling diverse menus. The kitchen is broken up into distinct stations or "zones" for different food types (like a grill station, a sauté station, a bakery), with each one acting like its own mini-kitchen.
A thoughtfully organized kitchen isn't just a nicety; it’s a critical safety feature. Reducing cross-traffic and unnecessary movement directly minimizes the risk of slips, falls, and collisions.
The stakes for getting this right are massive. The U.S. Bureau of Labor Statistics reported around 93,800 nonfatal injuries in full-service kitchens in 2019 alone. On the flip side, optimizing your kitchen workflow with smart equipment placement can boost productivity by up to 50% by cutting out wasted motion and streamlining how tasks get done. You can dig into more data on how ergonomic design impacts kitchen safety and efficiency to see the numbers for yourself.
Choosing and Placing Essential Restaurant Equipment
Once you’ve sketched out your workflow zones, it’s time to get down to the hardware. This is where the rubber meets the road in your commercial kitchen design—selecting and placing every piece of restaurant equipment. Your menu is your North Star here. It dictates every single thing you need, from the big-ticket cooking appliances to the smallest prep tools.
Think about it: the equipment for a classic Los Angeles pizza restaurant is a world away from what a Mexican food truck needs. The pizza joint is going to need massive deck ovens, heavy-duty planetary mixers for all that dough, and long stretches of cold prep tables for building pies. The taco truck, on the other hand, is all about high-output griddles, multi-well steam tables to hold carnitas and salsas, and super-efficient, compact refrigeration. Every piece of restaurant equipment has a job to do.
But it’s not just about what the equipment does. It's about what it needs. Every appliance comes with a technical spec sheet, and that document is non-negotiable. It spells out the utility requirements—electrical voltage, gas line BTUs, water hookups—and those specs will fundamentally shape your kitchen’s entire infrastructure.
Connecting Equipment to Utilities and Ventilation
Ignoring your utility and ventilation needs when placing equipment is a rookie mistake that will cost you dearly. You can't just drop a high-powered convection oven wherever you feel like it. It needs the right kind of power, and it absolutely must live under a properly sized ventilation hood.
Think of it this way: your restaurant equipment is the "what," and your utilities are the "how." A smart layout makes sure they line up perfectly.
- Group by Utility: Whenever you can, put equipment with similar needs together. Arranging your gas-powered range, charbroiler, and fryers in a single cookline makes running the gas plumbing way simpler and lets them all sit under one efficient ventilation hood.
- Ventilation is King: This is a big one. Any piece of gear that creates grease-laden vapor, heat, or smoke—fryers, griddles, ranges, you name it—must be located under a commercial exhaust hood. This isn't a suggestion; it's a strict health and fire code requirement. The hood's size is determined by the total footprint of the equipment underneath it.
- Water and Drainage: Place ice machines, steamers, dish machines, and prep sinks near existing water lines and floor drains. This cuts down on complex, expensive plumbing work.
Getting this right from the start saves you from soul-crushing (and budget-busting) construction changes and ensures you’ll actually pass your inspections. For a full rundown of what you might need, our guide to building a commercial kitchen equipment checklist is a great place to start.
The Keys to a Functional Workstation: Ergonomics and Clearance
Beyond the mechanicals, proper equipment placement is all about people. Creating ergonomic workstations is one of the smartest things you can do for your business. It reduces physical strain on your crew, which means better morale, fewer mistakes, and a much lower risk of workplace injuries. The whole idea is to build a space where your team can work their magic comfortably and safely for hours on end.
And that space around the equipment? It isn't just for comfort—it's the law. Health inspectors will bring a tape measure. They’re checking the clearance between equipment and walls to make sure your staff can get in there and clean every surface properly—front, back, and sides.
An ergonomic layout isn't a luxury; it's a core component of a productive and safe kitchen. When staff can pivot instead of walk, and reach instead of bend, you reduce fatigue and speed up service.
Keep these numbers in mind as you place your equipment:
- Main Aisles: Major traffic paths need to be at least 36 to 48 inches wide. This gives staff enough room to move freely and pass each other safely, even when they’re carrying hot pans or heavy bus tubs.
- Working Aisles: The space between two parallel lines of equipment should be a minimum of 36 inches. This gives your cooks elbow room to work without constantly bumping into each other.
- Cleaning Clearance: Make sure there's enough space behind and beside equipment for cleaning. Many Southern California health codes specify a minimum distance, like 6 inches, from walls, or they require the equipment to be on casters so it can be moved.
To give you a better idea of how this all fits together, here’s a quick-glance table breaking down equipment placement by zone.
Equipment Placement Considerations by Kitchen Zone
| Kitchen Zone | Essential Equipment Examples | Strategic Placement Tips |
|---|---|---|
| Receiving/Storage | Dunnage racks, shelving units, commercial refrigerators & freezers | Place near the back door for quick unloading. Keep dry storage separate from cold storage. Ensure 6 inches of floor clearance. |
| Food Prep | Prep tables, 3-compartment sinks, food processors, mixers, slicers | Group wet prep (sinks) and dry prep (tables) areas. Position near cold storage to minimize travel time for ingredients. |
| Cooking Line (Hot Line) | Ranges, ovens, fryers, griddles, charbroilers | Arrange in logical order of your cooking process. All items must be under the main ventilation hood. Allow space for landing plates. |
| Service/Plating | Heat lamps, passthrough windows, plate warmers, finishing stations | This is the bridge between the kitchen and FOH. Must be easily accessible to both cooks and servers to avoid bottlenecks. |
| Warewashing (Dish Pit) | 3-compartment sink, commercial dishwasher, clean dish racks, garbage disposal | Isolate this area to contain noise and moisture. Ensure a clear path for dirty dishes coming in and clean dishes going out. |
Thinking through each zone like this ensures every piece has a home that makes sense for your specific operation, keeping things efficient and safe.
Planning for Future Growth
Finally, a truly smart commercial kitchen layout anticipates the future. You’re not just building for opening day; you’re building for year three and beyond. Your business will (hopefully) grow, your menu will evolve, and you’ll eventually need to add or upgrade equipment.
Designing with some flexibility in mind now can save you from a massive, expensive overhaul later.
Think about your five-year plan. If you dream of expanding your Mexican food menu, maybe you leave a dedicated spot with the right electrical hookups for a future vertical broiler for al pastor. If you might add another fryer to your food truck's line down the road, make sure your fire suppression and ventilation systems can handle it. This kind of foresight turns your kitchen from a static space into an adaptable asset that grows right alongside your business.
Meeting Health Codes and Utility Demands
A brilliant commercial kitchen layout is completely useless if it can’t pass inspection. Seriously. This is where the rubber meets the road.
Navigating the tangled web of health, fire, and building codes—especially in tough jurisdictions like Los Angeles County—is one of the most make-or-break steps in your entire project. This is the moment your design moves from a cool sketch to a real, legal, and operational kitchen.
Getting this right isn't just about dodging fines. It’s about keeping your staff and customers safe and building a kitchen that will actually work under pressure for years. Think of it as the rock-solid foundation holding up your culinary dream.
Mastering Ventilation and Exhaust Systems
Proper ventilation is probably the single most scrutinized part of any kitchen inspection. An effective system pulls out all the heat, smoke, steam, and greasy air, making the space safer and more bearable to work in. Without it, you’re looking at major fire hazards and a guaranteed "FAIL" from the inspector.
The star of the show here is your commercial exhaust hood, and the type you need is dictated entirely by the cooking equipment you plan to slide underneath it.
- Type I Hoods: You absolutely need one of these over any equipment that produces grease. Think fryers, griddles, charbroilers—the fun stuff. They have grease filters that need constant cleaning.
- Type II Hoods: These are for equipment that just puts out heat and steam, like your convection ovens or high-temp dishwasher. No grease filters needed here.
The hood itself has to be bigger than the cooking equipment, extending at least six inches beyond the edges on all sides to properly capture everything. The fan's power, measured in cubic feet per minute (CFM), also needs to be calculated to handle the total output of your cook line.
This isn't just a local thing, either. You can find more info on the global commercial kitchen market trends on PR Newswire, but the push for efficient, compliant systems is worldwide. Wall-mounted canopy hoods, which can run anywhere from $200 to $6,850 plus the install, are a huge part of this trend.
Planning Your Utility Infrastructure
Every single piece of equipment you’ve picked out has its own specific thirst for electricity, gas, and water. A solid utility plan ensures your kitchen can handle the full load without tripping breakers, losing gas pressure, or running out of hot water in the middle of a Saturday night rush.
Start by making a master list—a utility schedule. Write down every piece of gear and its exact needs: voltage, amps, gas BTU rating, and water line size. Get this to your architect and contractors as early as possible.
Pro Tip: Always plan for more power than you think you need right now. Trust me, adding a circuit later is a huge, expensive headache. Running an extra one during the initial build-out is a smart investment in your future.
Plumbing is just as critical. Health codes are incredibly specific about sinks. You're going to need a few, no exceptions:
- A three-compartment sink for the classic wash, rinse, and sanitize routine.
- Separate handwashing sinks for your prep crew and service staff.
- A dedicated food preparation sink for things like washing produce.
- A mop or utility sink for all your cleaning needs.
Every sink needs hot and cold running water and proper drainage. You'll also need floor drains in key spots, like near the dish machine and steam kettles, to handle the inevitable spills and daily wash-downs.
Adhering to Health and Accessibility Standards
Beyond the guts of your utility plan, the layout itself must meet strict health department and ADA (Americans with Disabilities Act) standards. These rules dictate everything from the materials on your walls to how much space your team has to move around.
Health inspectors are trained to look for surfaces that are smooth, durable, and non-porous because they’re easy to clean and sanitize. This is why stainless steel is king. It's the industry standard for countertops, prep tables, and wall panels for a reason.
On the accessibility front, ADA guidelines make sure your kitchen is a workable environment for employees with disabilities. This boils down to a few key things:
- Aisle Width: Main walkways need to be at least 36 inches wide so a wheelchair can get through.
- Work Surface Height: You may need to have a section of your prep counters at a lower, accessible height.
- Clear Floor Space: Make sure there's enough room for people to maneuver easily at major workstations and in front of appliances.
Meeting these technical demands isn't optional. Bake them into your commercial kitchen layout from day one, and you’ll save yourself from costly rebuilds, failed inspections, and a delayed grand opening.
Budgeting and Finalizing Your Kitchen Blueprint
Alright, you've got your kitchen layout sketched out. Now comes the part where dreams meet dollars. This is the moment we move from napkin drawings to hard numbers and buildable plans. Getting this stage right is what separates a smooth opening from a project that goes way over budget and schedule.
This final push is all about hammering out a realistic budget, knowing where to put your money, and bringing in the right pros to translate your vision into a blueprint that the health department will actually approve.
Creating a Realistic Kitchen Budget
One of the biggest mistakes I see new operators make is just budgeting for the shiny new equipment. They see the price tag on a range or a walk-in cooler and think that's the bulk of the cost. Not even close. You have to account for everything—the obvious and the hidden. Those so-called "soft costs" can easily tack on an extra 20-30% to your total project.
To avoid nasty surprises, you need to break down your budget into a few key areas:
- New Equipment: This is your big-ticket list of restaurant equipment. Itemize every single piece, from the six-burner range down to the last wire shelf. Make sure you're getting quotes that include freight and installation, too.
- Construction and Installation: This is a big one. It covers framing, drywall, laying down flooring, and all the critical utility work—plumbing, gas lines, and electrical. This is also where your hood installation costs live, and it's a place where costs can balloon if not planned properly.
- Permits and Fees: Don't forget the city wants its cut. Whether you're in Los Angeles or Orange County, you'll be paying for building permits, health department plan checks, and fire department approvals. These fees add up fast.
- Professional Services: Budget for the experts. Your architect, kitchen design consultant, and engineers are an investment, not an expense. Their expertise is what stops you from making a $10,000 mistake down the line.
For a deeper dive into all the costs you can expect, check out our guide to restaurant startup costs breakdown. It’s packed with real-world numbers for Southern California businesses.
Where to Spend and Where to Save
Every dollar counts, and a smart operator knows where to invest in quality and where it's okay to be frugal. This isn't about being cheap; it's about being strategic. Making the right calls here can free up thousands of dollars without compromising your kitchen's core function.
Don't ever skimp on your workhorse restaurant equipment. I’m talking about your range, your refrigeration, and your dishwasher. These things run all day, every day. Investing in reliable, energy-efficient models will save you a fortune in utility bills and repair calls.
Think about it in terms of strategic trade-offs:
| Invest Heavily In | Be Frugal With |
|---|---|
| Refrigeration: A walk-in cooler that dies on a Friday night can cost you thousands in spoiled food. Reliability here is absolutely non-negotiable. | Prep Tables & Sinks: For most tasks, a standard-duty stainless steel table will work just as well as a pricey heavy-duty one. |
| Ventilation Hood: This is a major safety and compliance item. A cheap or poorly designed system is a recipe for failed inspections and a dangerous kitchen. | Smallwares: You don't need designer-brand sheet pans and tongs. You can get perfectly good, durable smallwares from a wholesale supplier. |
| High-Volume Cooking Equipment: The fryer in your food truck or the deck oven in your Los Angeles pizza restaurant has to keep up during the rush. Get something built to last. | Storage Shelving: As long as it's NSF-approved and can handle the weight, there's no reason to overspend on shelving for your dry stock room. |
From Sketch to Professional Floor Plan
Those hand-drawn layouts are a great way to start, but you can't hand them to a building inspector or a contractor. You need to bring in a professional who can turn your ideas into a formal, technical set of drawings.
This is where you hire an architect or a dedicated kitchen design consultant. They are the pros who will transform your workflow concepts into a detailed blueprint that covers all the bases:
- The Floor Plan: This is the bird's-eye view, drawn to scale, showing the exact placement of every wall, every piece of equipment, and every workstation.
- The Equipment Schedule: Think of this as the master list. It details every single piece of restaurant equipment, complete with model numbers and specs.
- The Utility Plan: This might be the most important drawing. It maps out every single electrical outlet, gas line, and plumbing connection your equipment needs.
- The Mechanical Plan: This drawing details your entire HVAC and ventilation system, showing the exact size and placement of your exhaust hood and ductwork.
Hiring someone who knows the ins and outs of Los Angeles restaurant codes is a game-changer. They'll spot potential problems before they happen, saving you time and money and ensuring your plan is ready to build. This collaboration is the final, essential step in making your dream kitchen a reality.
Your Top Kitchen Design Questions Answered
Even the most buttoned-up plan will spark questions along the way. Getting them answered before you start building is the best way to dodge expensive mistakes and set your kitchen up for success right from the jump.
Here are a few of the most common questions I hear from new restaurant and food truck owners all over Southern California.
What’s the Most Efficient Commercial Kitchen Layout?
This is the big one, and the honest answer is: there's no single "best" layout. The most efficient design is always the one that’s custom-built for your specific menu, your space, and how you serve your customers. What’s perfect for a high-volume Los Angeles pizza spot would absolutely torpedo a Mexican food restaurant focused on fine dining.
You need to pick a style that supports your operational DNA.
- Assembly Line: This is the undisputed champ for any concept with a linear workflow. Think of Los Angeles food trucks, pizzerias, or sandwich shops where food is built in a straight, logical sequence. It’s all about speed and cutting out wasted motion.
- Island Layout: A fantastic choice for larger kitchens where you have multiple chefs working at once. It puts the main cooking suite—your ranges, grills, and fryers—right in the middle, creating a central hub that’s great for communication and a dynamic workflow.
- Zone Style: This is what you see in massive operations like hotels or big catering companies. The kitchen gets divided into specialized stations, almost like mini-kitchens within the main one—a pastry zone, a grill zone, a garde manger station—that all function independently.
No matter which you choose, the goal is always the same: create a layout that slashes wasted steps, stops staff from bumping into each other, and keeps the clean and dirty tasks completely separate.
How Much Space Do I Need Between Equipment?
This all comes down to two things: safety and workflow. While local codes can have minor differences, there are some solid rules of thumb you need to follow for a functional kitchen. Getting this wrong is a fast track to failed inspections and a dangerous work environment.
For your main traffic aisles, you need at least 36-48 inches of clearance. This gives your team enough room to pass each other safely, especially when someone’s rushing by with a hot pan or a heavy stockpot. Between the actual pieces of restaurant equipment on your cook line, you want a minimum of 36 inches so cooks aren't tripping over each other.
Always, always double-check your local Los Angeles or county health and fire codes. They are the ultimate authority and have very specific clearance rules to ensure equipment is accessible for cleaning and to prevent fire hazards.
What Are the First Steps in Designing a Kitchen Layout?
It can feel like a mountain to climb, but the starting point is actually pretty simple: your menu.
Your menu is the blueprint for literally everything else. It tells you exactly what restaurant equipment you need, what stations you have to build, and the kind of workflow you need to support. Don't even think about buying a single piece of equipment until you have that menu locked down.
Once that’s set, the path forward is pretty clear:
- Measure Everything: Get hyper-detailed measurements of your space. I’m talking about noting every door, window, column, and existing utility hookup.
- Make Your Equipment List: Go through your menu item by item and list every single piece of gear you'll need to produce it. Be thorough.
- Start Sketching: Grab a pencil and paper (or some software) and start drawing out the basic flow. Map the journey food will take, from the delivery door to storage, then to prep, cooking, the service window, and finally, to the dish pit.
Bringing in a professional kitchen designer at this stage is probably the smartest money you can spend. They've seen it all and can help you avoid the common mistakes that end up costing thousands to fix later on.
Bringing your restaurant vision to life requires the right equipment from a partner who gets the Southern California food scene. At LA Restaurant Equipment, we offer top-quality commercial kitchen equipment—all backed by warranties—at warehouse-direct prices. We're here to help you build a compliant, functional kitchen without destroying your budget.
Explore our full catalog and get a free quote today at https://larestaurantequipment.com.