

The first rule of griddle cleaning? Scrape it down while it's still hot—somewhere between 300-350°F is the sweet spot. Get all that built-up gunk and debris off, apply a good food-safe cleaner, give it a scrub with the right kind of pad, and squeegee the mess straight into the grease trap.
Think of it as the most important five minutes of your end-of-day routine. Nail this daily, and you'll sidestep that stubborn carbon buildup that kills cooking performance.
Your Guide to a Flawless Commercial Griddle
In any Los Angeles kitchen, from a high-volume pizza place to a neighborhood food truck, the griddle is the undisputed workhorse. Keeping it in prime condition goes way beyond just looking clean. It's about protecting the quality of your food, stopping flavors from mingling, and making sure your expensive restaurant equipment lasts.
A well-maintained griddle delivers that beautiful, even heat distribution we're all after. No more fighting with frustrating hot spots or getting inconsistent sears that can send a perfect dish sideways.
This guide is all about practical, no-nonsense advice for keeping your griddle in peak condition. We'll walk through the essentials, from the tools you need on hand to the daily habits that make all the difference. For kitchens that really want to lock in their processes, looking into detailed Standard Operating Procedures for food service equipment maintenance can be a game-changer for consistency and training.
Understanding Your Griddle Type
You can't treat all griddles the same—the material of your cooktop changes the entire game. Grab the wrong tool or cleaner, and you could cause some serious, irreversible damage.
- Steel Griddles: These are the tanks of the kitchen. They're the most common for a reason—they're durable and can take a beating from heavy-duty scrapers and grill bricks. They build up carbon, but they're tough enough to handle it.
- Chrome Griddles: Beautiful to look at and great for radiating less heat into the kitchen, but they are delicate. You absolutely must use non-abrasive pads and specialty scrapers to avoid scratching that chrome plating right off.
- Composite Griddles: These are known for incredible heat transfer and quick recovery times. They need a much gentler approach, usually just mild, food-safe detergents and soft pads.
The single biggest mistake I see is a cook taking a grill brick to a chrome top. What works perfectly on a standard steel griddle will absolutely destroy a chrome surface, turning a simple cleanup into a nightmare replacement.
Before we dive into the step-by-step, let's get your toolkit in order. Having the right restaurant equipment and supplies ready to go makes the daily clean a quick, painless process instead of a chore.
Griddle Cleaning Essentials At a Glance
Here’s a quick rundown of the must-have tools for an effective daily cleaning routine. Keeping these stocked and accessible is half the battle.
| Item | Purpose | Pro Tip |
|---|---|---|
| Griddle Scraper | Removes loose food debris and grease. | Use long, even strokes. A long handle keeps your hands away from the heat. |
| Griddle Cleaner | Food-safe chemical that lifts baked-on carbon. | Apply only to a hot surface (300-350°F) for best results. |
| Scrub Pad/Grill Brick | Agitates and removes stubborn buildup. | Match the abrasive level to your griddle type! Never use a brick on chrome. |
| Griddle Squeegee | Pushes all the liquid and residue into the grease trap. | A high-temp squeegee won't melt or warp on the hot surface. |
| Clean Cloths/Towels | For wiping down the surface after cleaning. | Microfiber cloths work great for a final polish on a cool surface. |
| Seasoning Oil | Protects the griddle surface and prevents rust. | A thin, even coat of high-smoke-point oil is all you need. |
Getting this down gives you the confidence to clean any griddle the right way, every time. It’s a core skill, whether you’re running the line or just training new staff. And if you’re thinking about an upgrade, checking out the latest commercial griddles will show you what's out there to fit your kitchen's needs. Master these steps, and you’ll be ready for those health inspections, no problem.
Mastering the Five Minute End-of-Day Clean
In any busy Los Angeles kitchen, whether it's a Silver Lake food truck or a downtown Los Angeles pizza spot, the end-of-service rush is always intense. The last thing anyone wants is a long, drawn-out cleaning session. That's where the five-minute griddle clean becomes a non-negotiable ritual. It turns a dreaded chore into a quick, efficient process that sets you up for a better shift tomorrow.
The secret isn’t about scrubbing harder; it’s about working smarter with a hot griddle. Keeping the temperature between 300-350°F is the absolute key. At this heat, grease and food bits stay loose and are much easier to lift off, all without the kind of aggressive scraping that can damage your restaurant equipment over time.
The Hot Griddle Advantage
Trying to clean a cold griddle is an uphill battle against solidified grease and baked-on carbon. It’s a waste of time and elbow grease. A hot surface, on the other hand, does most of the heavy lifting for you. The heat supercharges the cleaning agents, helping them break down tough grime almost on contact.
This method isn't just faster—it's way more effective. It stops that deep carbon buildup that eventually creates hot spots, ruins your heat distribution, and messes with the flavor of your food. Think of it as preventative maintenance that pays off with every single plate you send out.
"The difference between cleaning a hot griddle versus a cold one is night and day. A hot clean takes minutes and leaves a pristine surface. A cold clean feels like you're trying to chisel stone—it's a waste of time and energy that no LA kitchen can afford."
This chart breaks down the essentials, showing you the right tools for the job and how to make the whole process flow smoothly.
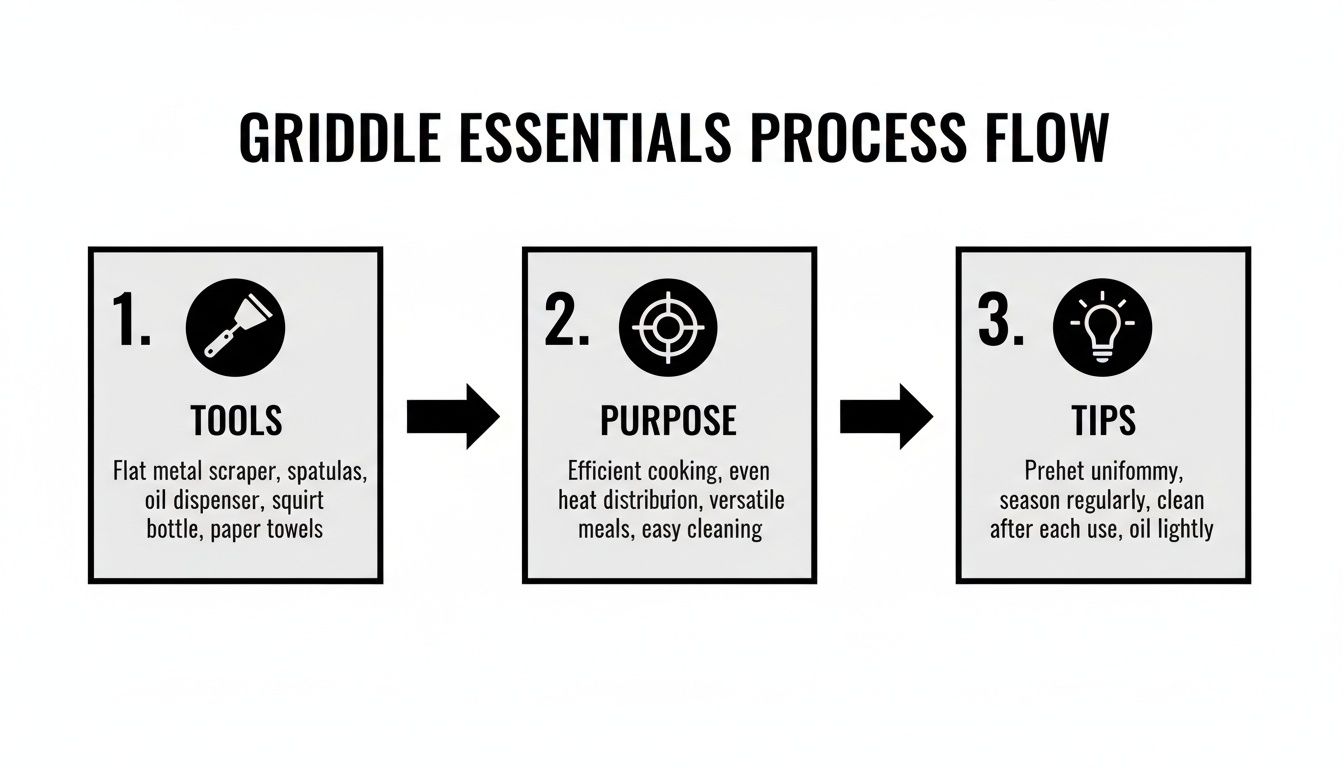
As you can see, it's a simple loop: scrape, treat, and clear. Each tool has a specific purpose to make the workflow as streamlined as possible.
Your Step-by-Step Hot Cleaning Method
First things first, grab your long-handled scraper. While the griddle is still hot, make long, even passes across the entire surface. Your goal is to get all the loose food particles and pooled grease off the flattop and into the grease trap. This initial scrape is crucial; it clears the deck so your cleaning solution can get right to work on the stubborn, baked-on layers.
Next, it's time for a high-quality, food-safe liquid griddle cleaner. Pour it evenly across the hot surface, and you’ll immediately see it start to bubble and lift the grime. That chemical reaction is what makes this process so quick.
Now, give the surface a thorough scrub with a heavy-duty grill pad attached to a long-handled holder. Work in circular motions, applying firm but even pressure. The combination of heat, cleaner, and a little bit of muscle will dissolve even the toughest carbon spots without gouging the steel. Just be careful with overly abrasive tools like grill bricks—unless you have a thick steel griddle that can handle them, it's best to stick to pads.
Finally, use a high-temperature squeegee to pull all the liquid and lifted gunk straight into the grease trap. This is the most satisfying step, as it leaves behind a clean, clear surface. A quick wipe-down with a damp cloth (on a pad holder, of course, to protect your hands) removes any last traces of cleaner. Remember, your grease trap and other tools need regular sanitation, too. For a deeper dive into kitchen hygiene, check out our guide on setting up a 3 compartment sink.
The Power of Efficiency
Switching to this quick method has a huge impact on kitchen operations. In fact, modern cleaning products have slashed griddle cleaning times from a tedious 20–30 minutes to less than five. By using a dedicated liquid cleaner on a hot plate at 300–350°F with the right tools, a flattop can be fully restored in just 3–5 minutes. That’s a massive boost for labor efficiency.
This isn't a luxury; it's a necessity in a fast-paced environment. It means your team gets out the door faster, you keep a better handle on labor costs, and your most valuable piece of cooking equipment is perfectly prepped and ready for another profitable day.
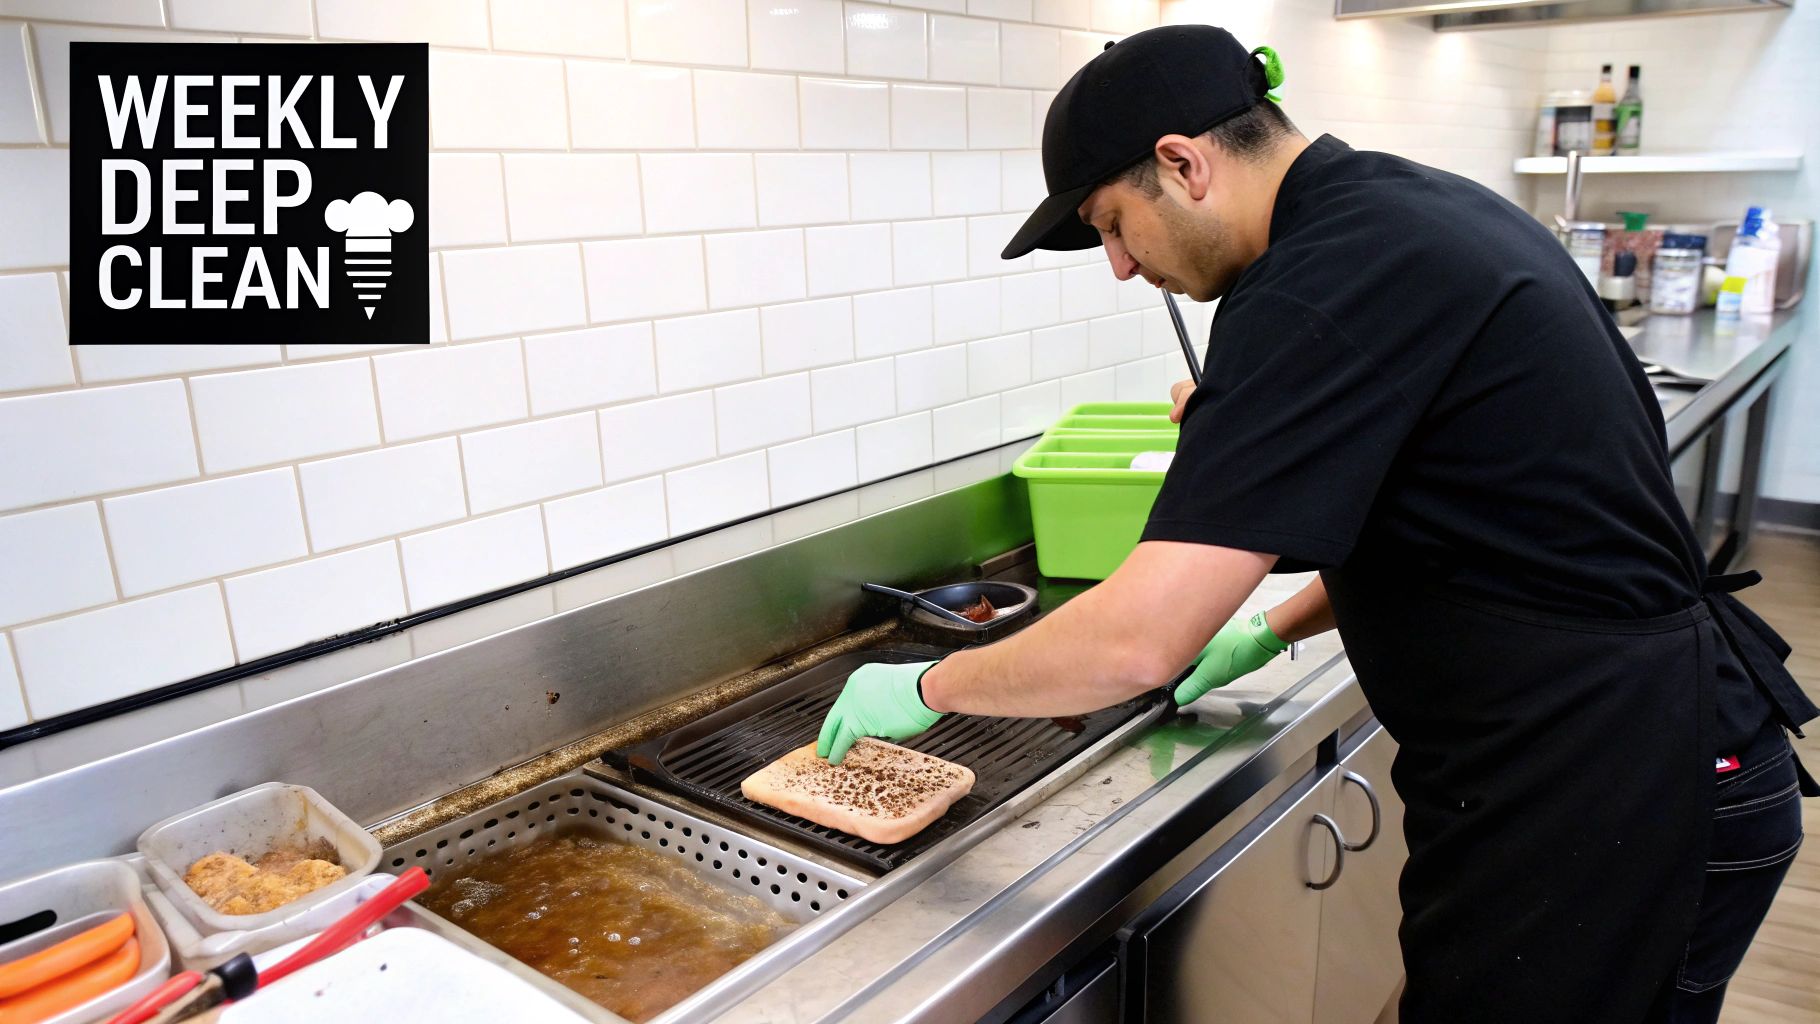
Implementing a Weekly Deep Cleaning Schedule
Daily wipe-downs keep your griddle ready for the next service, but the weekly deep clean is what truly protects its lifespan and performance. This is where you really get in there and attack the stubborn, baked-on carbon that a quick daily scrape just can't handle. For any busy Los Angeles food truck or Mexican restaurant, this weekly ritual is absolutely non-negotiable for preventing slow heat-up times and even serious fire hazards.
This deeper maintenance is all about what the five-minute clean misses: the sides, the backsplash, and that all-too-often forgotten grease trap. It's a full-on reset that protects your investment in restaurant equipment and keeps your kitchen safe.
Beyond the Surface: Tackling Carbon Buildup
That dark, crusty layer of carbon might look like a badge of honor, but trust me, it’s a performance killer. It acts like an insulator, blocking heat from transferring efficiently to your food. This is what causes those frustrating hot spots, uneven cooking, and longer ticket times as your griddle struggles to keep up with the rush.
To break through that tough layer, you’ll need more than just a scraper. A grill brick or a heavy-duty scouring pad is the right tool for the job on a standard steel griddle. Let the griddle cool down until it's warm—not searing hot—and use the brick with a bit of oil. Make sure you move with the grain of the metal to grind away the carbon without gouging the surface.
A weekly deep clean isn't just about making the griddle look pretty. It’s about restoring its efficiency. A griddle free of carbon buildup heats faster and more evenly, which directly translates to better food quality and lower energy bills.
To make the job easier, a powerful commercial oven and grill cleaner can save you a ton of elbow grease. These cleaners are specifically formulated to dissolve the polymerized grease that acts like glue, holding all those carbon deposits together. Once it breaks down, the gunk scrubs away much more easily.
Cleaning the Grease Trap and Griddle Surroundings
A spotless cooking surface is only half the battle. The grease trap and the areas around it are critical parts of your weekly maintenance, mainly for safety. An overflowing or filthy grease trap is a massive fire hazard waiting to happen.
During your weekly clean, slide the grease trap all the way out. Scrape out every bit of solidified grease and give it a thorough wash in your three-compartment sink using a strong, food-safe degreaser. While the trap is out, grab a putty knife and clean the channel leading to it. You want to make sure there's no buildup that could cause a nasty clog later on.
But don't stop there. Grease splatters everywhere during service, coating the backsplash and side splashes with a sticky, flammable film. A good degreaser and a heavy-duty towel are essential for cutting right through this grime.
Creating a Consistent Checklist for Your Team
Consistency is everything. Your griddle deep clean needs to be just as thorough on a Tuesday with your B-team as it is on a Saturday with your lead cook. The easiest way to make that happen is with a clear, laminated checklist posted right near the griddle.
A checklist takes all the guesswork out of the process and keeps everyone accountable. It should be a simple, step-by-step guide that anyone can follow.
Weekly Deep Clean Checklist Example
-
Surface De-carbonizing:
- Cool griddle to a warm, safe temperature.
- Apply griddle cleaner or oil to the surface.
- Scrub the entire surface with a grill brick or appropriate scourer.
- Wipe clean with a damp, clean cloth.
-
Grease Management System:
- Remove and completely empty the grease trap.
- Wash the trap with degreaser and hot water; let it air dry.
- Scrape and clean out the grease trough and channel.
-
Surrounding Areas:
- Degrease and wipe down the backsplash.
- Degrease and wipe down side splashes.
- Wipe down the front panel and control knobs.
-
Final Steps:
- Reinstall the clean grease trap.
- Apply a thin, fresh coat of seasoning oil to the griddle plate.
- Manager signs off to confirm completion.
This weekly schedule is a cornerstone of proper kitchen upkeep. To see how this fits into a bigger strategy, check out our guide on commercial kitchen equipment maintenance. By making this deep clean a non-negotiable part of your weekly routine, you’re protecting your staff, your food quality, and your bottom line.
Seasoning Your Griddle for a Perfect Non-Stick Surface
A perfectly seasoned griddle is the secret weapon in any high-volume kitchen. It’s what separates the pros from the amateurs. We’re not just talking about cleaning; we're talking about creating a slick, natural, non-stick surface that gives you a flawless sear on your burgers and pancakes, service after service.
This whole process is called polymerization. In simple terms, when you heat a thin layer of the right oil on the steel, its fatty acids break down and bond directly to the metal. This creates a hard, plastic-like coating that is the key to stopping food from sticking and making your end-of-night cleanup a whole lot faster. When you've invested in new restaurant equipment, mastering this is non-negotiable for protecting that investment.
Choosing the Right Oil for Seasoning
The oil you choose makes all the difference. You absolutely need an oil with a high smoke point—that’s the temperature where it starts to burn. If you grab the wrong oil, like olive oil or butter, you’ll just end up with a sticky, gummy disaster instead of that glass-like finish you’re aiming for.
Here are the best oils for the job:
- Canola Oil: The workhorse. It’s cheap, easy to find, and has a respectable smoke point around 400°F.
- Grapeseed Oil: A favorite for many chefs. It has a neutral flavor and a high smoke point of about 420°F.
- Flaxseed Oil: Often called the king of seasoning oils because its high omega-3 content creates an incredibly tough layer of polymerization. It is a bit pricier, though.
- Specialized Griddle Oils: Some brands sell their own conditioning oils made just for this. They work great but aren't always necessary.
The trick is to heat the oil past its smoke point. That’s what kicks off the chemical reaction you need, without torching the oil and creating off-flavors.
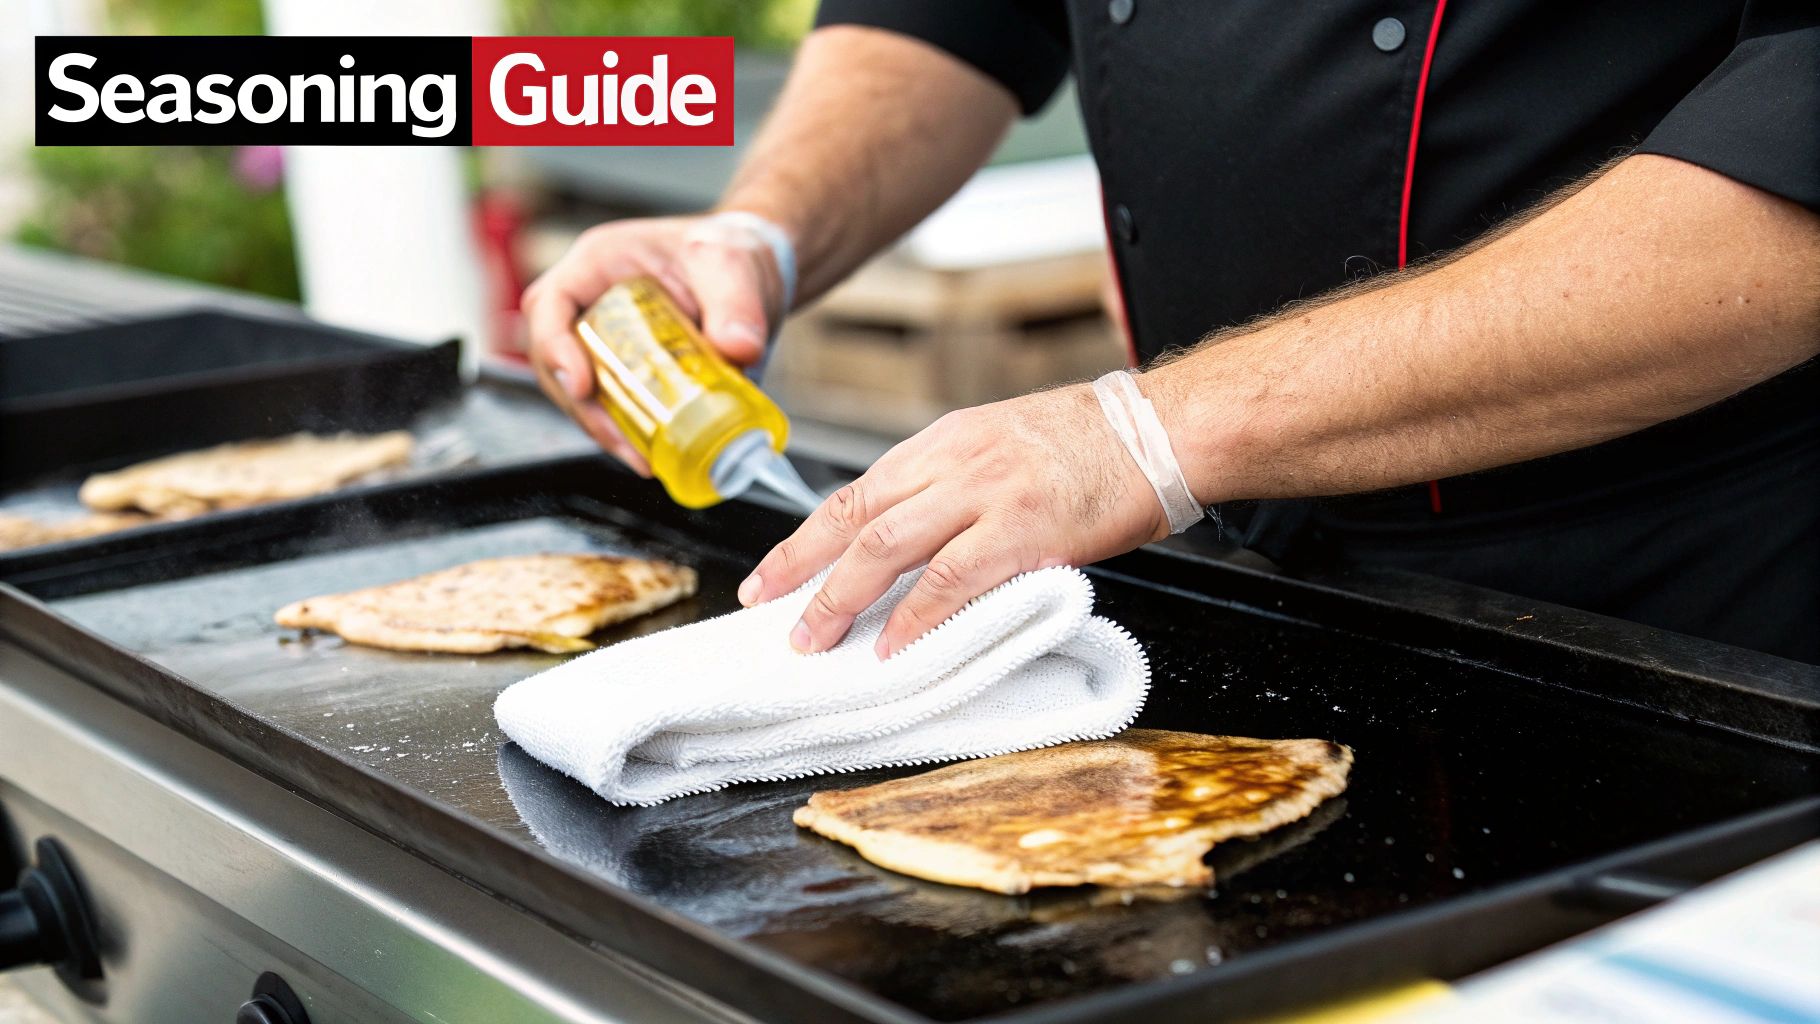
The Seasoning Process Step by Step
Whether you're firing up a brand-new griddle or bringing one back to life after a deep clean, the method is the same. Just remember two things: patience and thin layers.
First, make sure the griddle is impeccably clean and bone dry. Any little bit of leftover food or moisture will get trapped under the new seasoning, ruining the bond.
Next, pour a very small amount of your high-smoke-point oil onto the surface. Use a clean, lint-free towel to spread a paper-thin, even layer across the entire cooktop, getting the sides and corners too. It should be so thin that it barely looks like anything is there. Too much oil is your enemy here; it will just pool and turn into a sticky mess.
Now, fire up the griddle to between 350-400°F. Let it cook at that temp until the oil completely stops smoking, which usually takes 15-20 minutes. Don't panic when you see smoke—that's the magic happening. It’s the sign that the oil is polymerizing and bonding to the steel.
Once the smoking subsides, kill the heat and let the griddle cool down completely. You should see the surface getting a little darker and shinier. To build a truly bulletproof surface, you’ll want to repeat this whole process 3-4 times.
"Think of seasoning like painting a wall. You wouldn't slap on one thick, sloppy coat and expect it to look good. You apply several thin, even coats, letting each one dry completely. That's how you build a strong, durable finish that lasts."
Dealing with the Enemy: Rust
Rust is the archenemy of any steel griddle. It pops up when the seasoning layer gets stripped away, exposing the bare metal to moisture and air. This usually happens after a really aggressive deep clean or if someone forgets to properly dry the griddle after service.
Thankfully, a little rust isn't a death sentence. For light surface spots, just scrubbing it with a bit of oil and a mildly abrasive pad will usually lift it right off.
If you’re facing a more serious patch of rust, you’ll need to be more aggressive:
- Scrape and Scrub: Grab a grill brick or some steel wool and scrub off all the visible rust. Get it all.
- Neutralize with Vinegar: Mix up a 50/50 solution of white vinegar and water and apply it to the rusted areas. Let it sit for a few minutes; the acid will neutralize any lingering rust particles.
- Rinse and Dry Thoroughly: Wipe the vinegar off with a damp cloth, then get the griddle completely dry. I like to turn the heat on low for a few minutes just to be sure all the moisture has evaporated.
- Re-season Immediately: This is the most important step. As soon as that griddle is clean and dry, you need to start the re-seasoning process right away to build that protective barrier back up.
Properly seasoning your griddle isn't just a cleaning chore—it's the single most important piece of maintenance you can do. It protects your restaurant equipment, makes your food better, and keeps your line running smoothly.
Troubleshooting Common Griddle Problems
Even if you follow your cleaning and seasoning routine to the letter, griddles can still act up. A sudden issue during a packed dinner rush can throw your whole kitchen into chaos. For any Los Angeles restaurant or food truck operator trying to keep things moving, understanding the common culprits—and how to fix them fast—is non-negotiable.
Most griddle problems aren't a sign your equipment is about to die. Instead, think of them as clues that your maintenance just needs a little tweak. Whether it's food sticking in one spot or a sudden plume of smoke, these issues are usually easy to solve without a costly service call.
Diagnosing and Solving Food Sticking
One of the most common complaints I hear is food suddenly clinging to the griddle surface. This is almost always a sign of a compromised or uneven seasoning layer. It usually happens in one specific high-traffic spot where spatulas and scrapers have worn down that protective coating.
Instead of shutting everything down to re-season the entire griddle, you can do a quick spot-seasoning. Here’s how to tackle it on the fly:
- Isolate and Clean: Scrape the problem area down to the bare metal. A quick wipe with a damp cloth gets rid of any loose bits.
- Apply Oil: Dab a very small amount of high-smoke-point oil right onto the affected area.
- Spread Thinly: Grab a clean, lint-free cloth and spread that oil into a paper-thin layer. You want just enough to create a sheen, not a puddle.
- Heat It Up: Let the griddle's heat work its magic, polymerizing the oil for a few minutes until it stops smoking.
This simple trick reinforces the non-stick surface exactly where it’s needed, letting you get right back to cooking without any more sticking. It’s a lifesaver during a busy service.
Taming Uneven Heating and Hot Spots
Ever notice your pancakes cooking way faster on one side of the griddle than the other? That's a classic sign of uneven heating, and the usual suspect is carbon buildup. That dark, crusty layer acts like an insulator, blocking heat from transferring properly from the burners to the griddle plate.
The result is a surface with wild temperature swings. You get hot spots that scorch food in one area while leaving it raw just inches away.
The fix is almost never a thermostat problem; it's a cleaning problem. A targeted deep clean with a grill brick or a heavy-duty scourer on those built-up areas will strip away the insulating carbon and bring back even heat distribution.
Think of it like clearing a blocked pipe. Once you remove the gunk, the energy—in this case, heat—can flow freely again, giving you consistent, reliable performance. A thorough weekly deep clean is your best defense against this all-too-common issue.
Why Is My Griddle Smoking Excessively?
A little sizzle and smoke is normal, but if your griddle is billowing smoke when there's nothing even on it, you’ve got a problem. This is usually caused by one of two things: leftover food crud or the wrong kind of oil.
First, make sure the griddle is scraped completely clean after every single use. Even tiny food particles left behind will burn and smoke the next time the griddle heats up.
Second, check your oil. If you used an oil with a low smoke point (like olive oil) or just went way too heavy on the seasoning oil, it’s going to burn off and smoke you out. Stick to high-smoke-point oils like canola, grapeseed, or a dedicated griddle oil, and always, always apply it in a razor-thin layer. Mastering this is a key part of learning how to clean a commercial griddle properly and preventing headaches down the line.
Answering Your Top Commercial Griddle Questions
To wrap things up, we're tackling some of the most common questions we hear from restaurant and food truck owners across Los Angeles and Orange County. These are the real-world "what if" scenarios that pop up in busy kitchens. Think of this as your go-to guide for getting the details right.
Getting these little things right is what separates a decent griddle maintenance routine from a great one.
What Is the Best Oil to Season a Commercial Griddle?
The best oils for the job all have one thing in common: a high smoke point. You need an oil that can take the heat without turning into a sticky, bitter mess.
Good choices are canola oil, grapeseed oil, or one of the specialty griddle conditioning oils on the market. Stay away from oils with low smoke points, like extra virgin olive oil or butter. They’ll just break down and smoke way too fast, creating a gummy residue instead of that hard, slick, non-stick surface you're after.
Can I Use Ice or Cold Water to Clean a Hot Griddle?
You might have seen an old-school line cook throw ice on a griddle to "shock" the gunk off, but this is a shortcut you absolutely want to avoid. That drastic, rapid temperature change—called thermal shock—is the fastest way to warp or even crack the thick steel griddle plate.
A warped griddle cooks unevenly, and a cracked one means you're shopping for a replacement. It's much smarter to clean the griddle while it's still warm (around 300-350°F) using the right tools and cleaners.
"Thermal shock is the fastest way to ruin a perfectly good griddle. A little patience and the right technique will save you thousands in repair or replacement costs. Don't trade a few minutes of cleaning time for the life of your equipment."
How Often Should I Empty the Grease Trap?
This really depends on your menu and volume. If you’re running a busy kitchen and slinging fatty items like bacon and burgers, that grease trap needs to be emptied at the end of every single shift. Make it a non-negotiable part of your closing checklist.
An overflowing trap isn't just a disgusting mess; it's a serious fire hazard. In fact, a full grease trap is one of the most common culprits behind kitchen fires. Get in the habit of cleaning it daily to keep your crew and your business safe.
My Griddle Has Chrome Plating. Can I Use a Grill Brick?
Absolutely not. Never, ever use anything abrasive like a grill brick, steel wool, or a heavy-duty scour pad on a chrome griddle. Those tools are made for standard steel surfaces and will scratch, scrape, and permanently ruin that delicate chrome plating.
Once that chrome is damaged, it's game over. It loses its non-stick magic and becomes a nightmare to clean. For chrome, you have to stick with non-abrasive pads, special scrapers designed for chrome, and the cleaning solutions your manufacturer recommends. Protect that investment.
Proper maintenance isn't just a chore; it's a direct investment in the health of your kitchen. Daily griddle care is directly tied to how long your restaurant equipment will last and how much it costs to run. A griddle that's cleaned and seasoned properly every day can serve you well for up to 20 years with minimal headaches. Neglect it, and you could be looking for a replacement in as little as 7–10 years. If you want to see just how consistency pays off, you can discover more insights about equipment longevity on The Restaurant Warehouse.
For restaurant owners in Los Angeles and Orange County looking to upgrade or replace their cooking line, LA Restaurant Equipment offers a wide selection of new, warranty-backed commercial griddles at warehouse-direct prices. Explore our inventory and find the perfect fit for your kitchen at https://larestaurantequipment.com.